Researcher Guide
PRISM helps researchers collect real-world data through a smartphone application aimed to gently catch participants in a moment of hearing difficulty. PRISM can capture a snapshot of your real-world environment in that moment. This includes:
- Audio: A short 30-second clip of the sound around you.
- Context: Your rating of how hard it was to hear speech.
This data helps build the PRISM machine learning framework to automatically recognise difficult listening situations and adjust hearing aids in real-time.
The PRISM Research Portal serves as the interface for data collection and study management for Researchers conducting “experiments” within the PRISM ecosystem. Researchers use this application to design experiments, manage study cohorts, and deploy tasks to Participants. It is the control center for your data collection needs.
The PRISM Android App and PRISM WearOS App serve as the interface for Participants to contribute data to a PRISM experiment. Participants can install the app and then participate in experiments by clicking the link in an invitation email sent through the PRISM Research Portal. See the Participant Guide for more information on how to use the PRISM App.
This guide assumes you are a researcher conducting experiments and the PRISM Research Portal is running and you are connected to it (likely at http://127.0.0.1:8000). See the Setup Guide for more information on how to set up and connect to the PRISM Research Portal.
Experiment Setup on the Research Portal
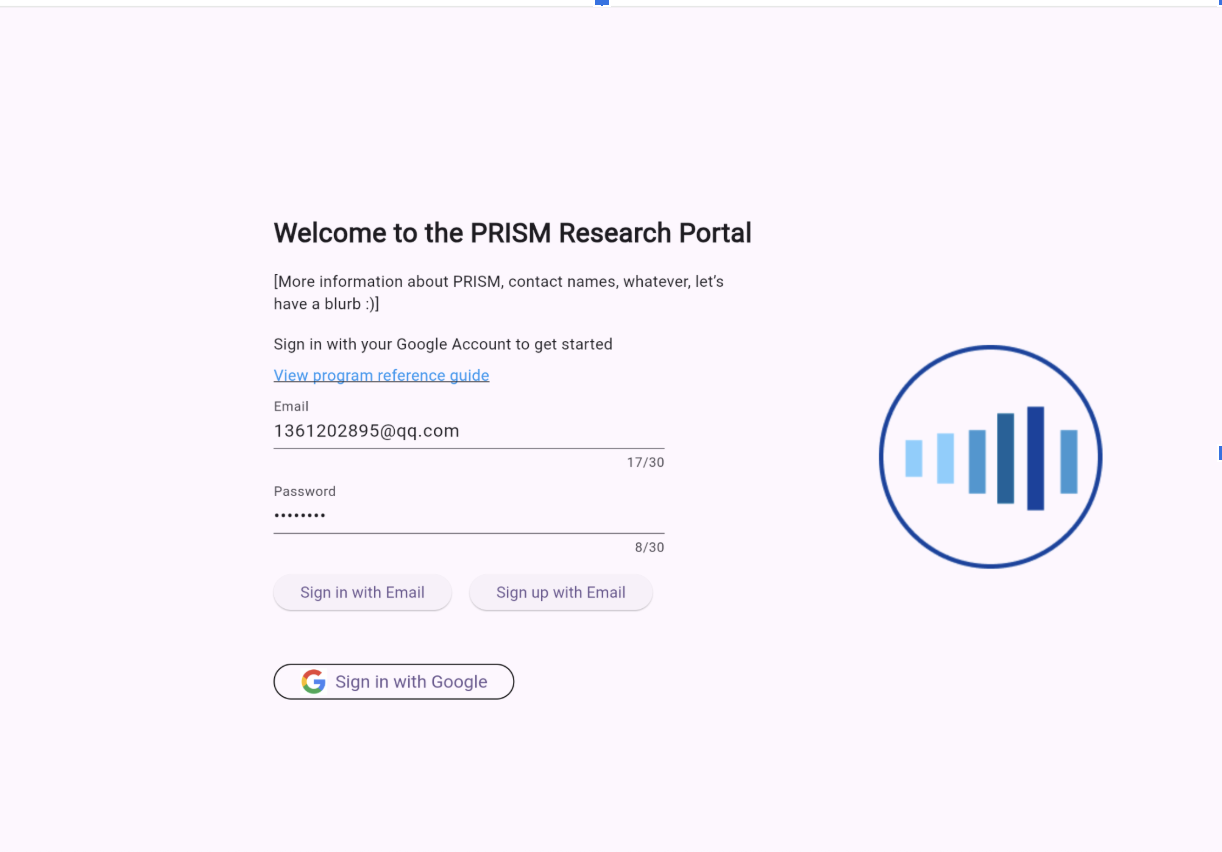
Step 1: Sign up
Click “Sign up with Email”.
Then you should receive a verification email:
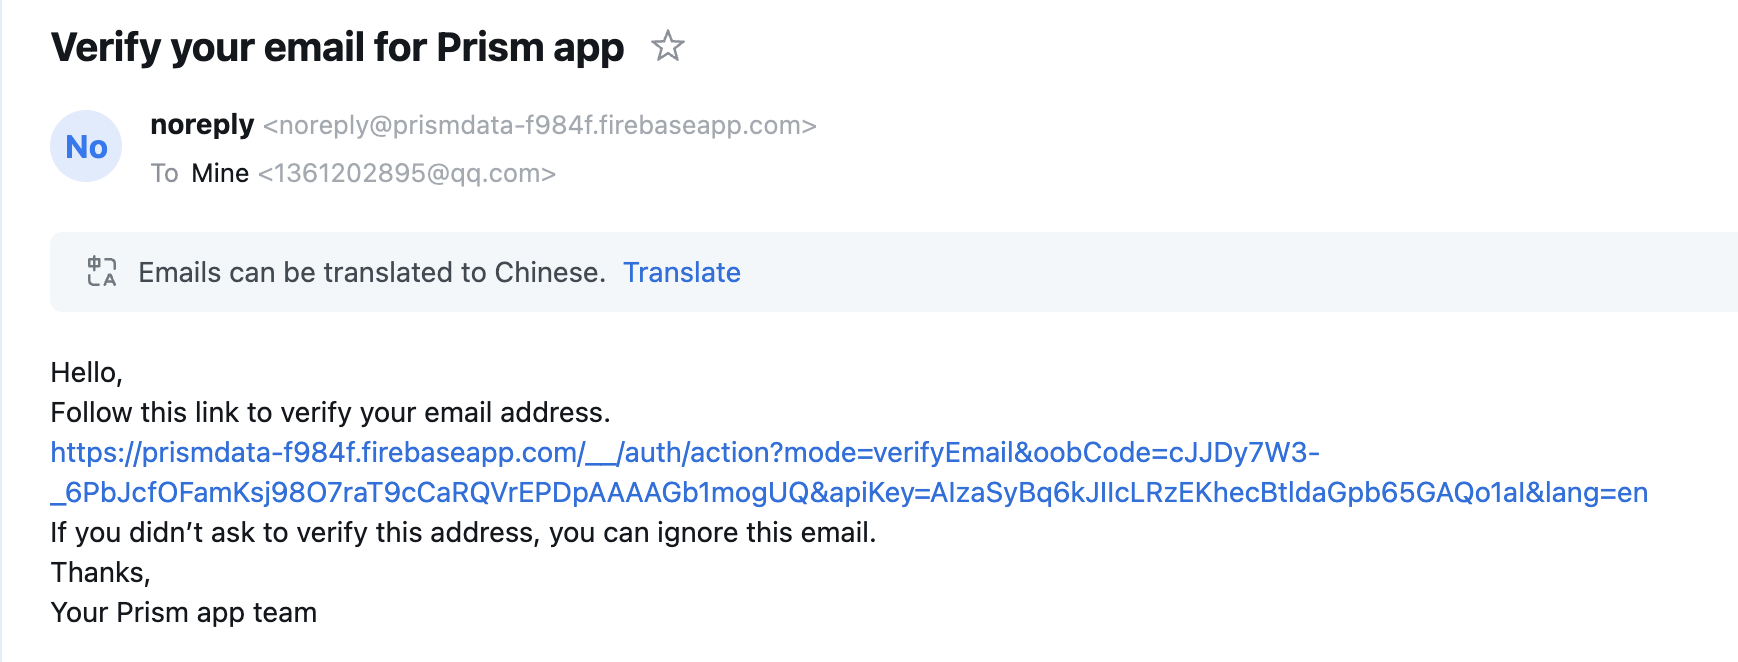
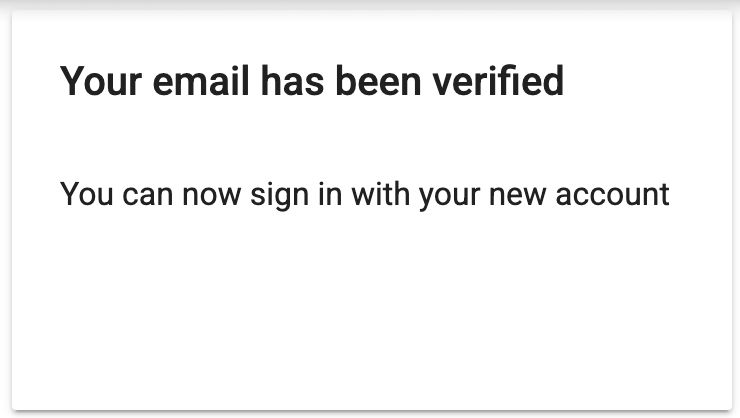
Note: If you try to click “Sign up” again, it will show you “An account with this email already exists.” You won’t be able to sign in unless you click the link to verify it. Once you have verified your email by clicking the link, you can see the following prompt:
Step 2: Notification
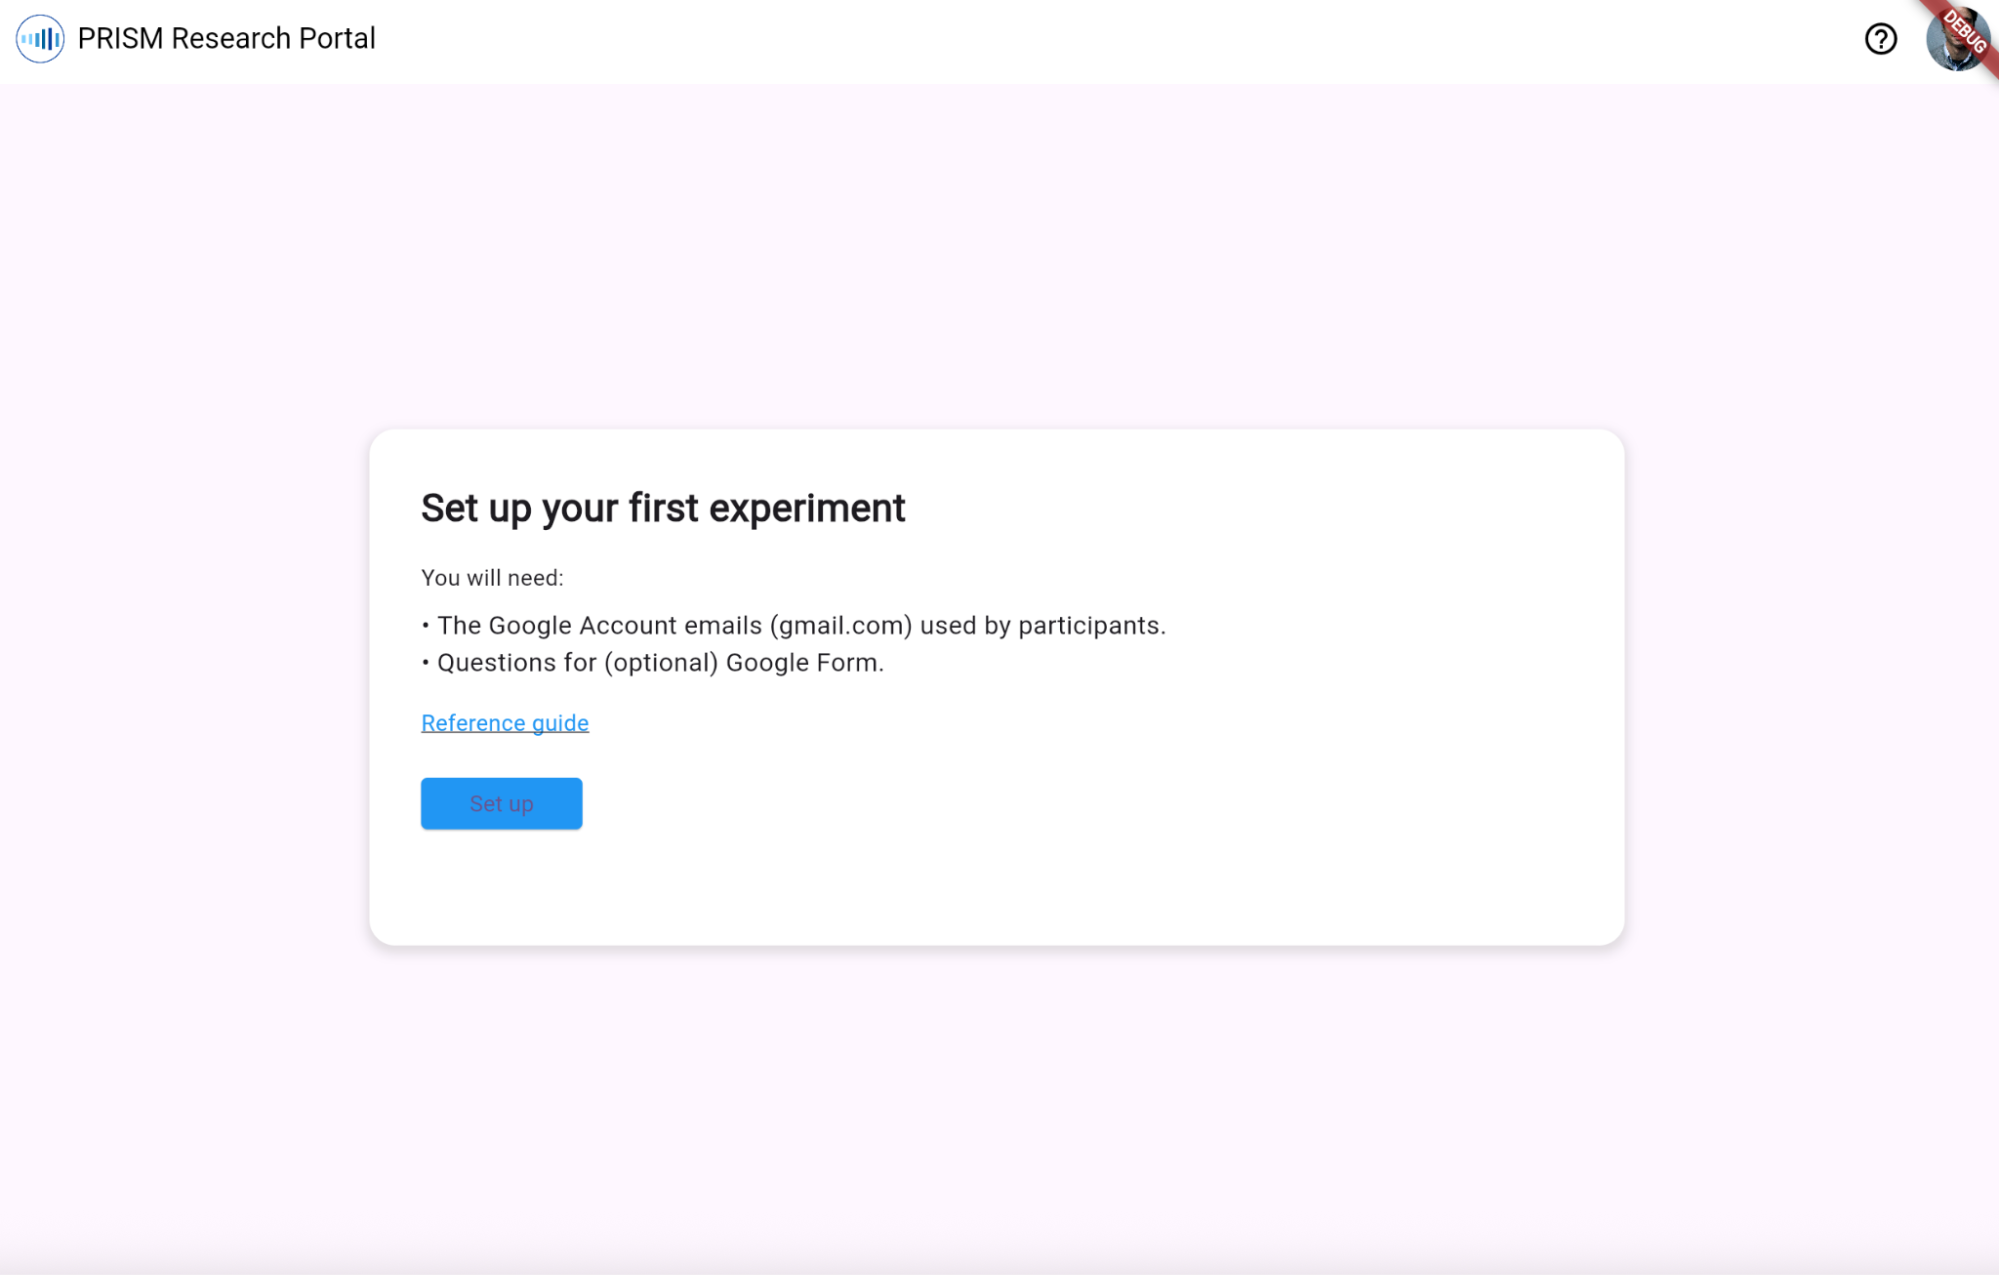
Click “Set up”, it will guide you to the first page.
Step 3: Setup the first experiment
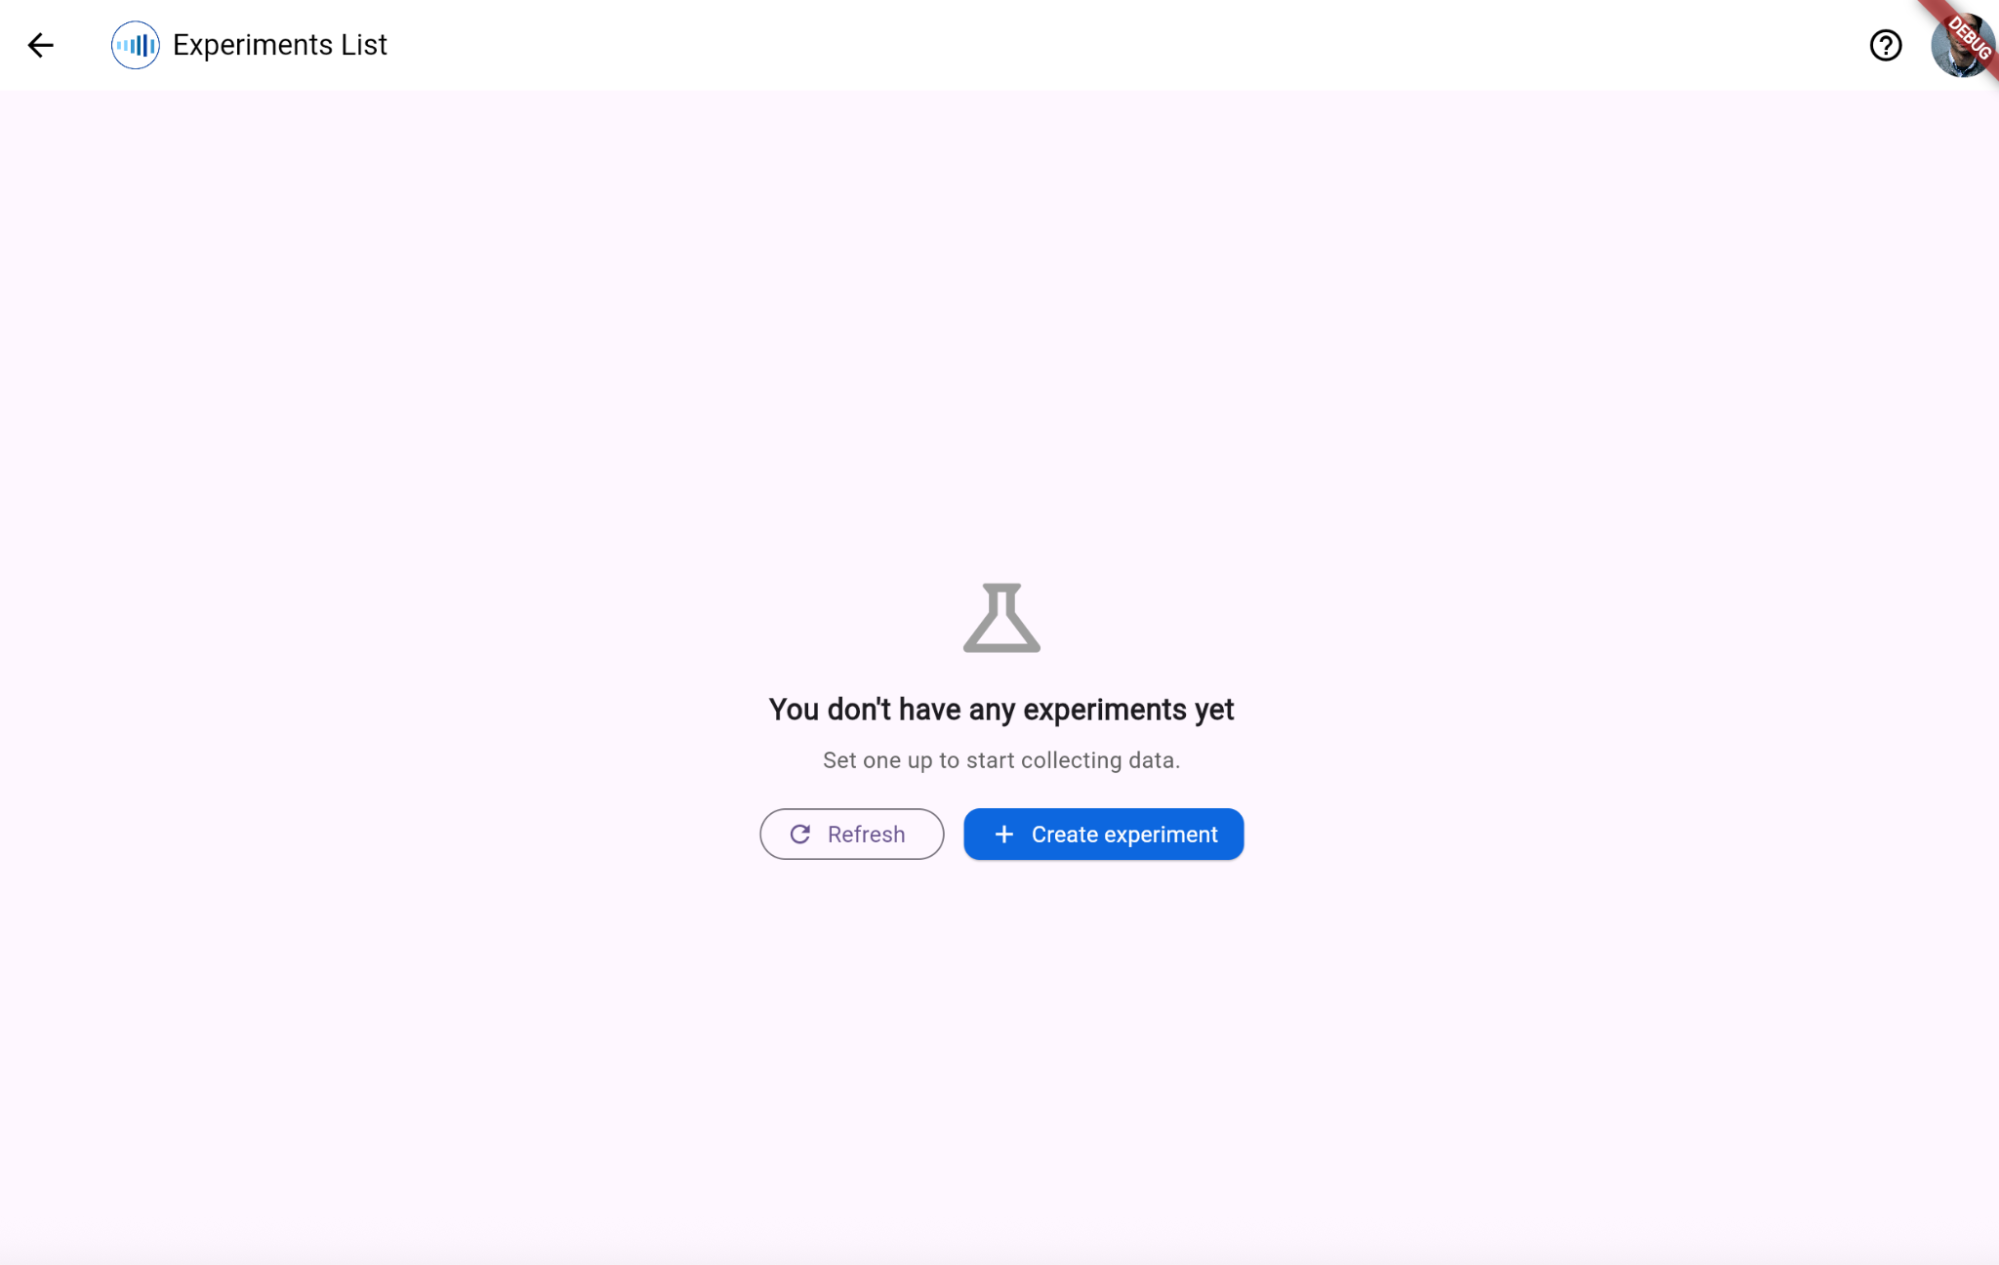
Click “Create experiment”.
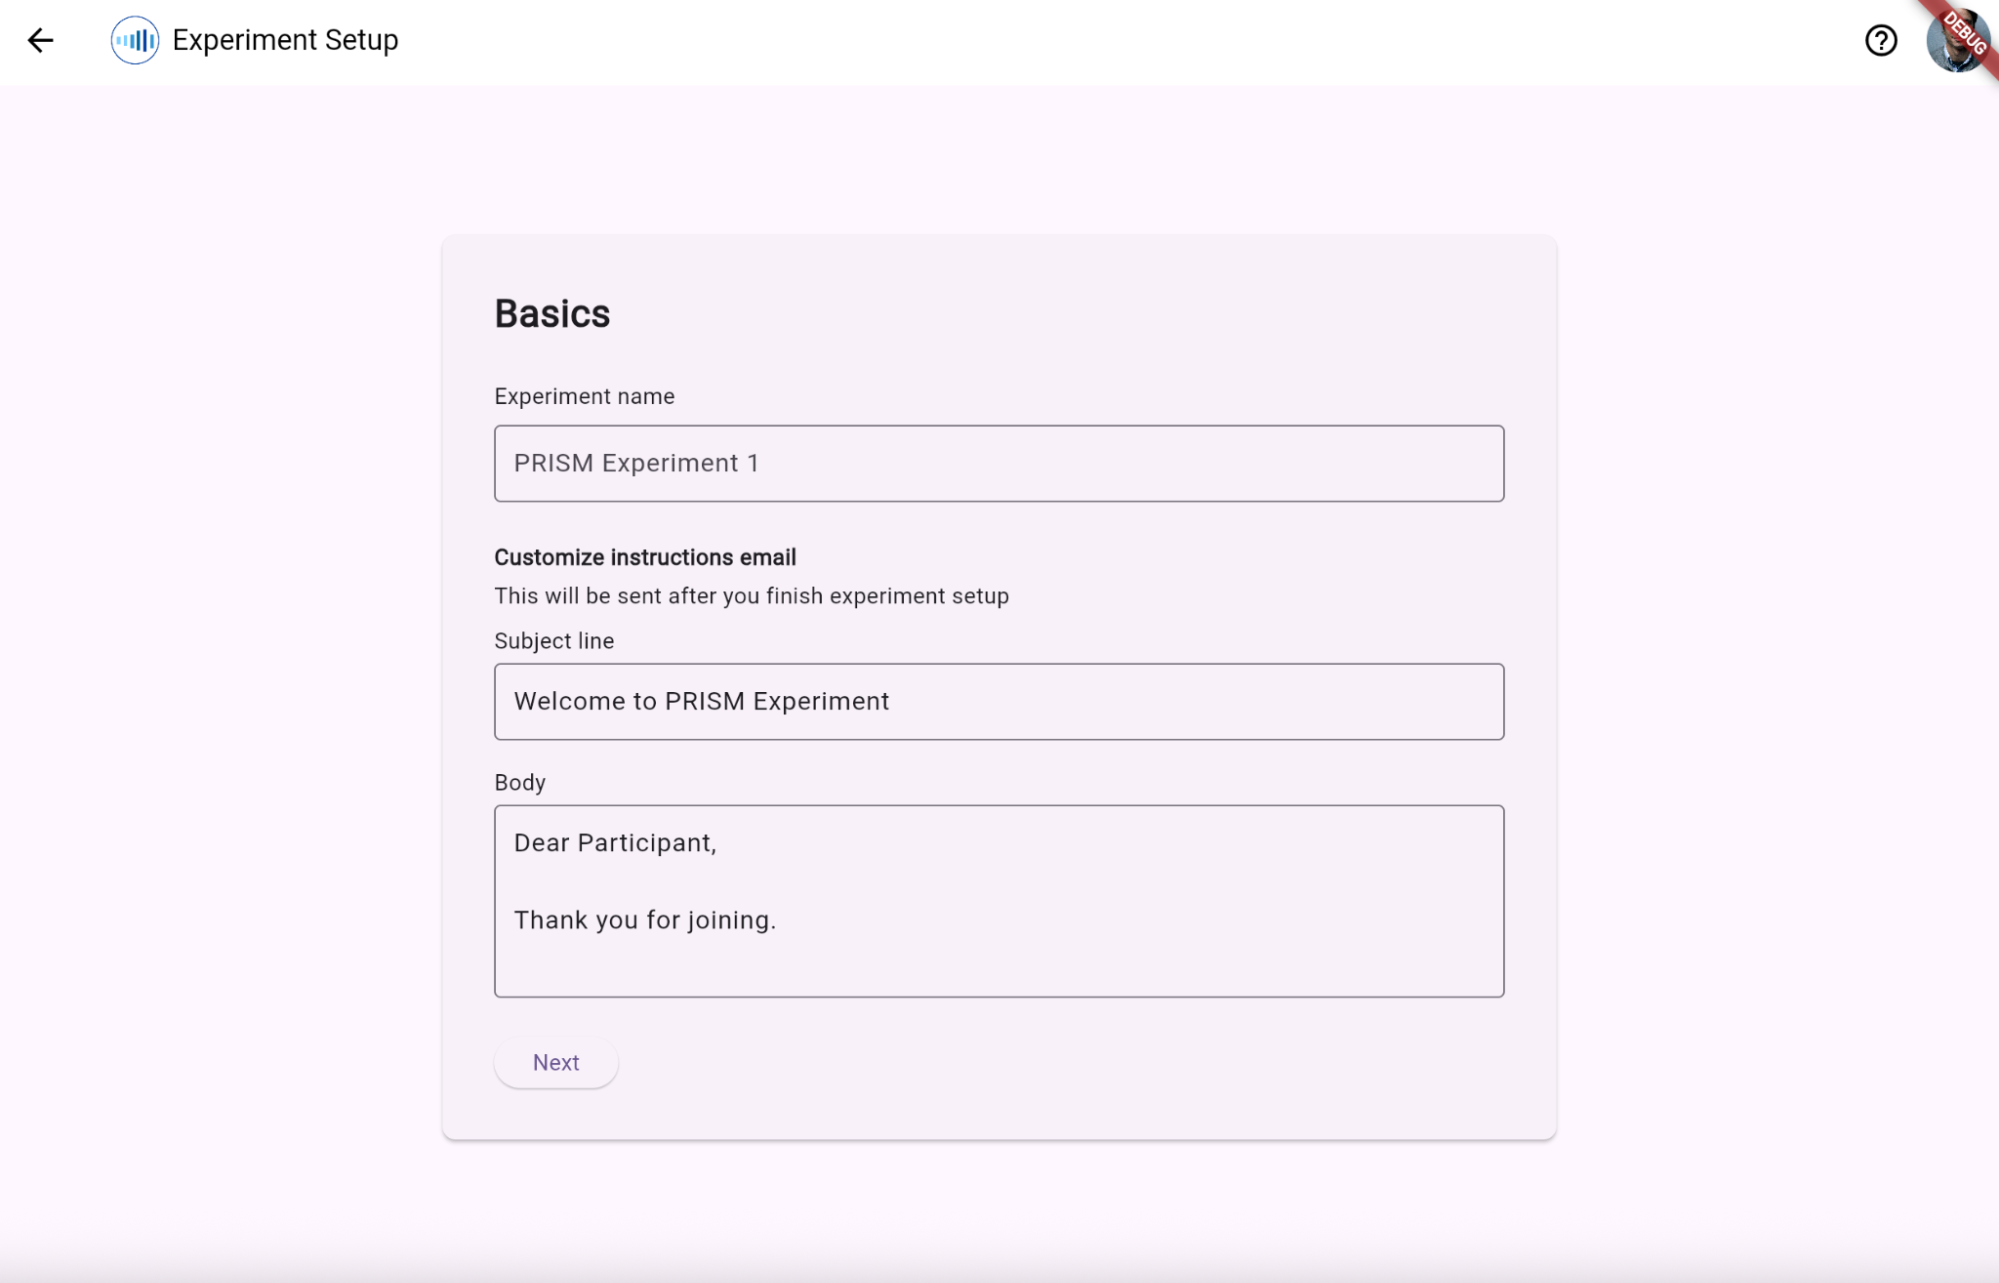
Step 4: Fill in the basic information
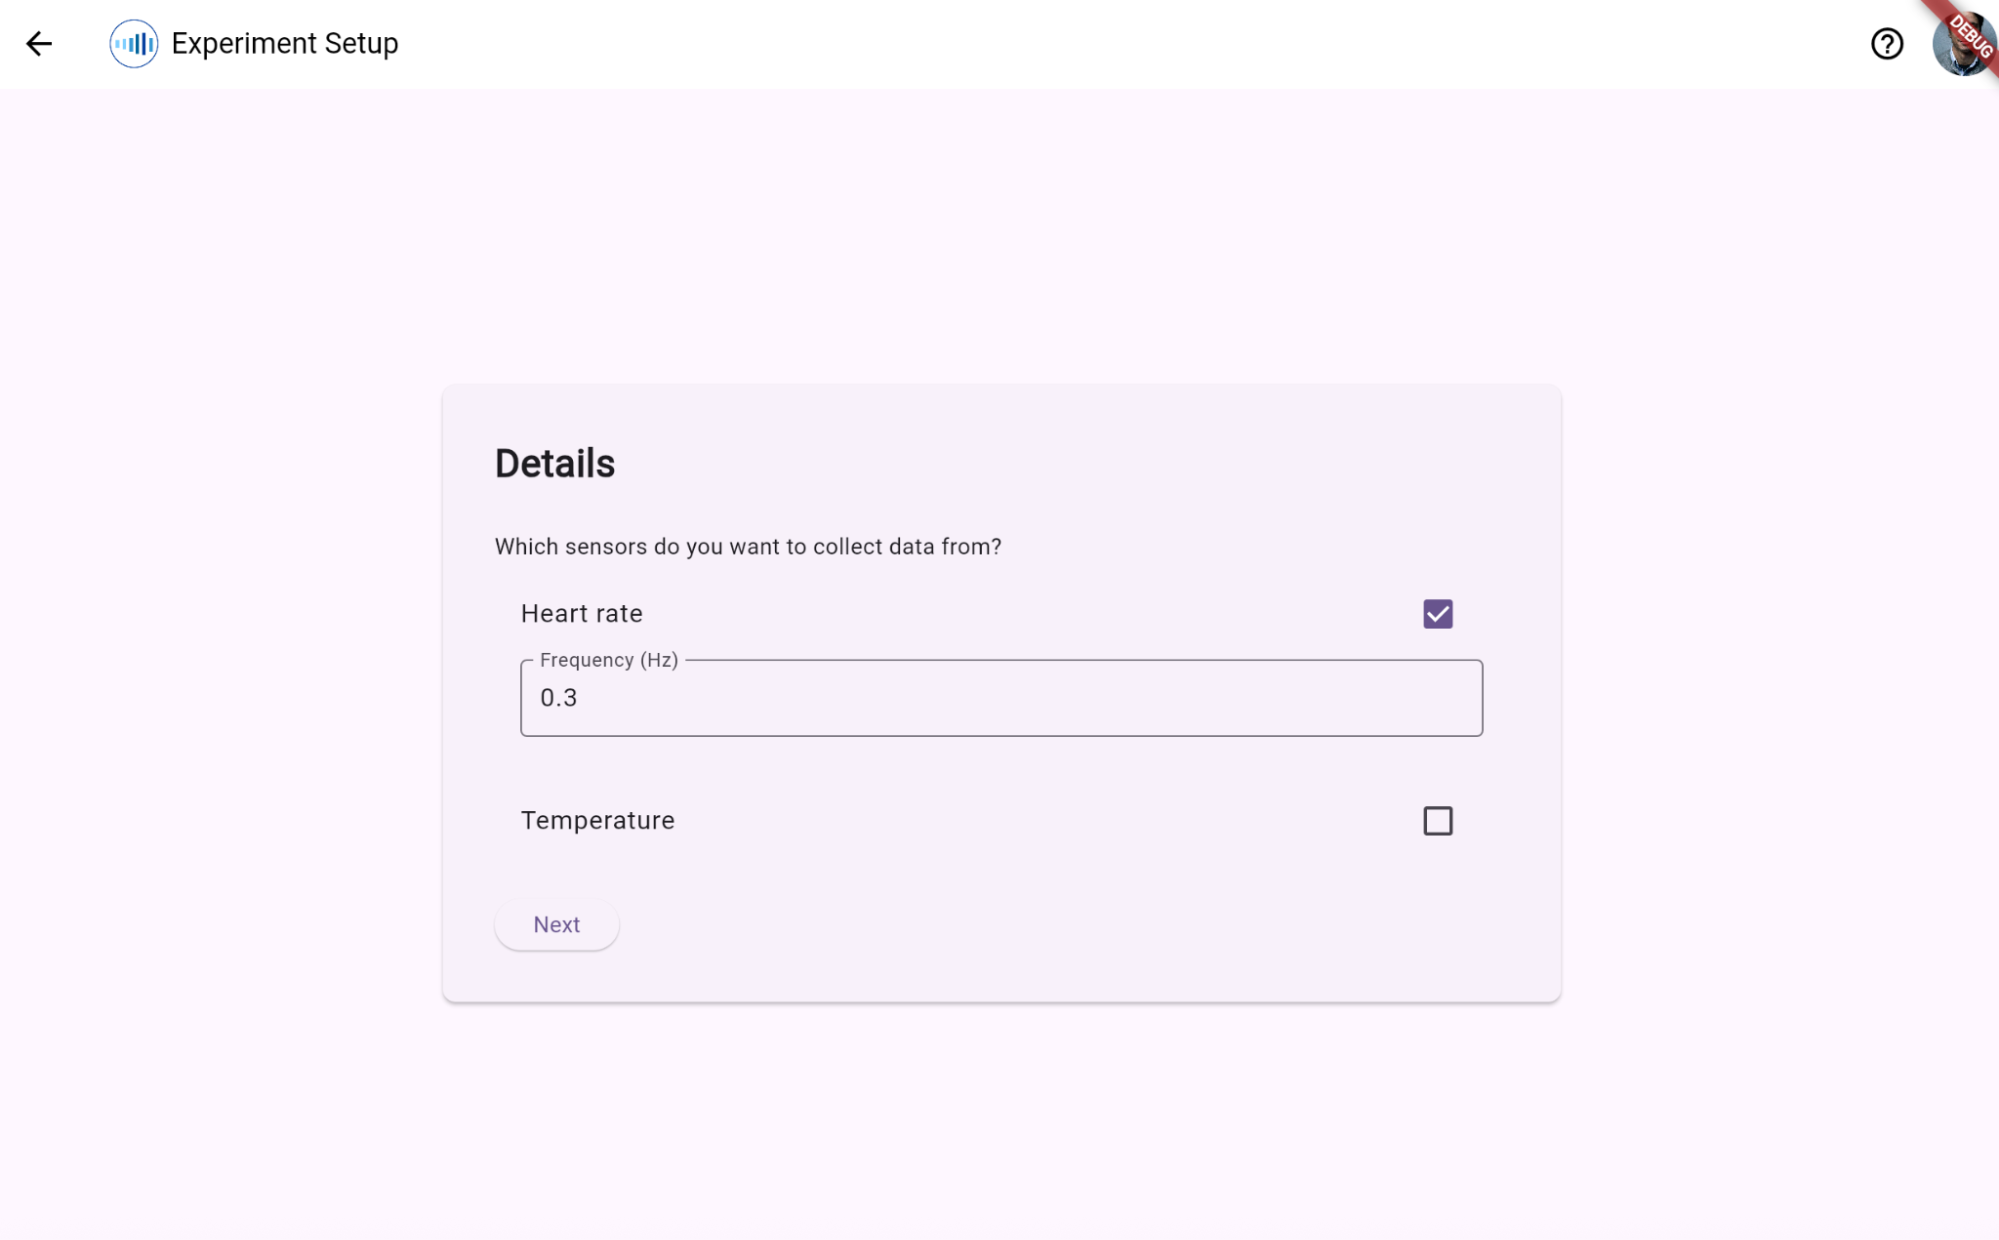
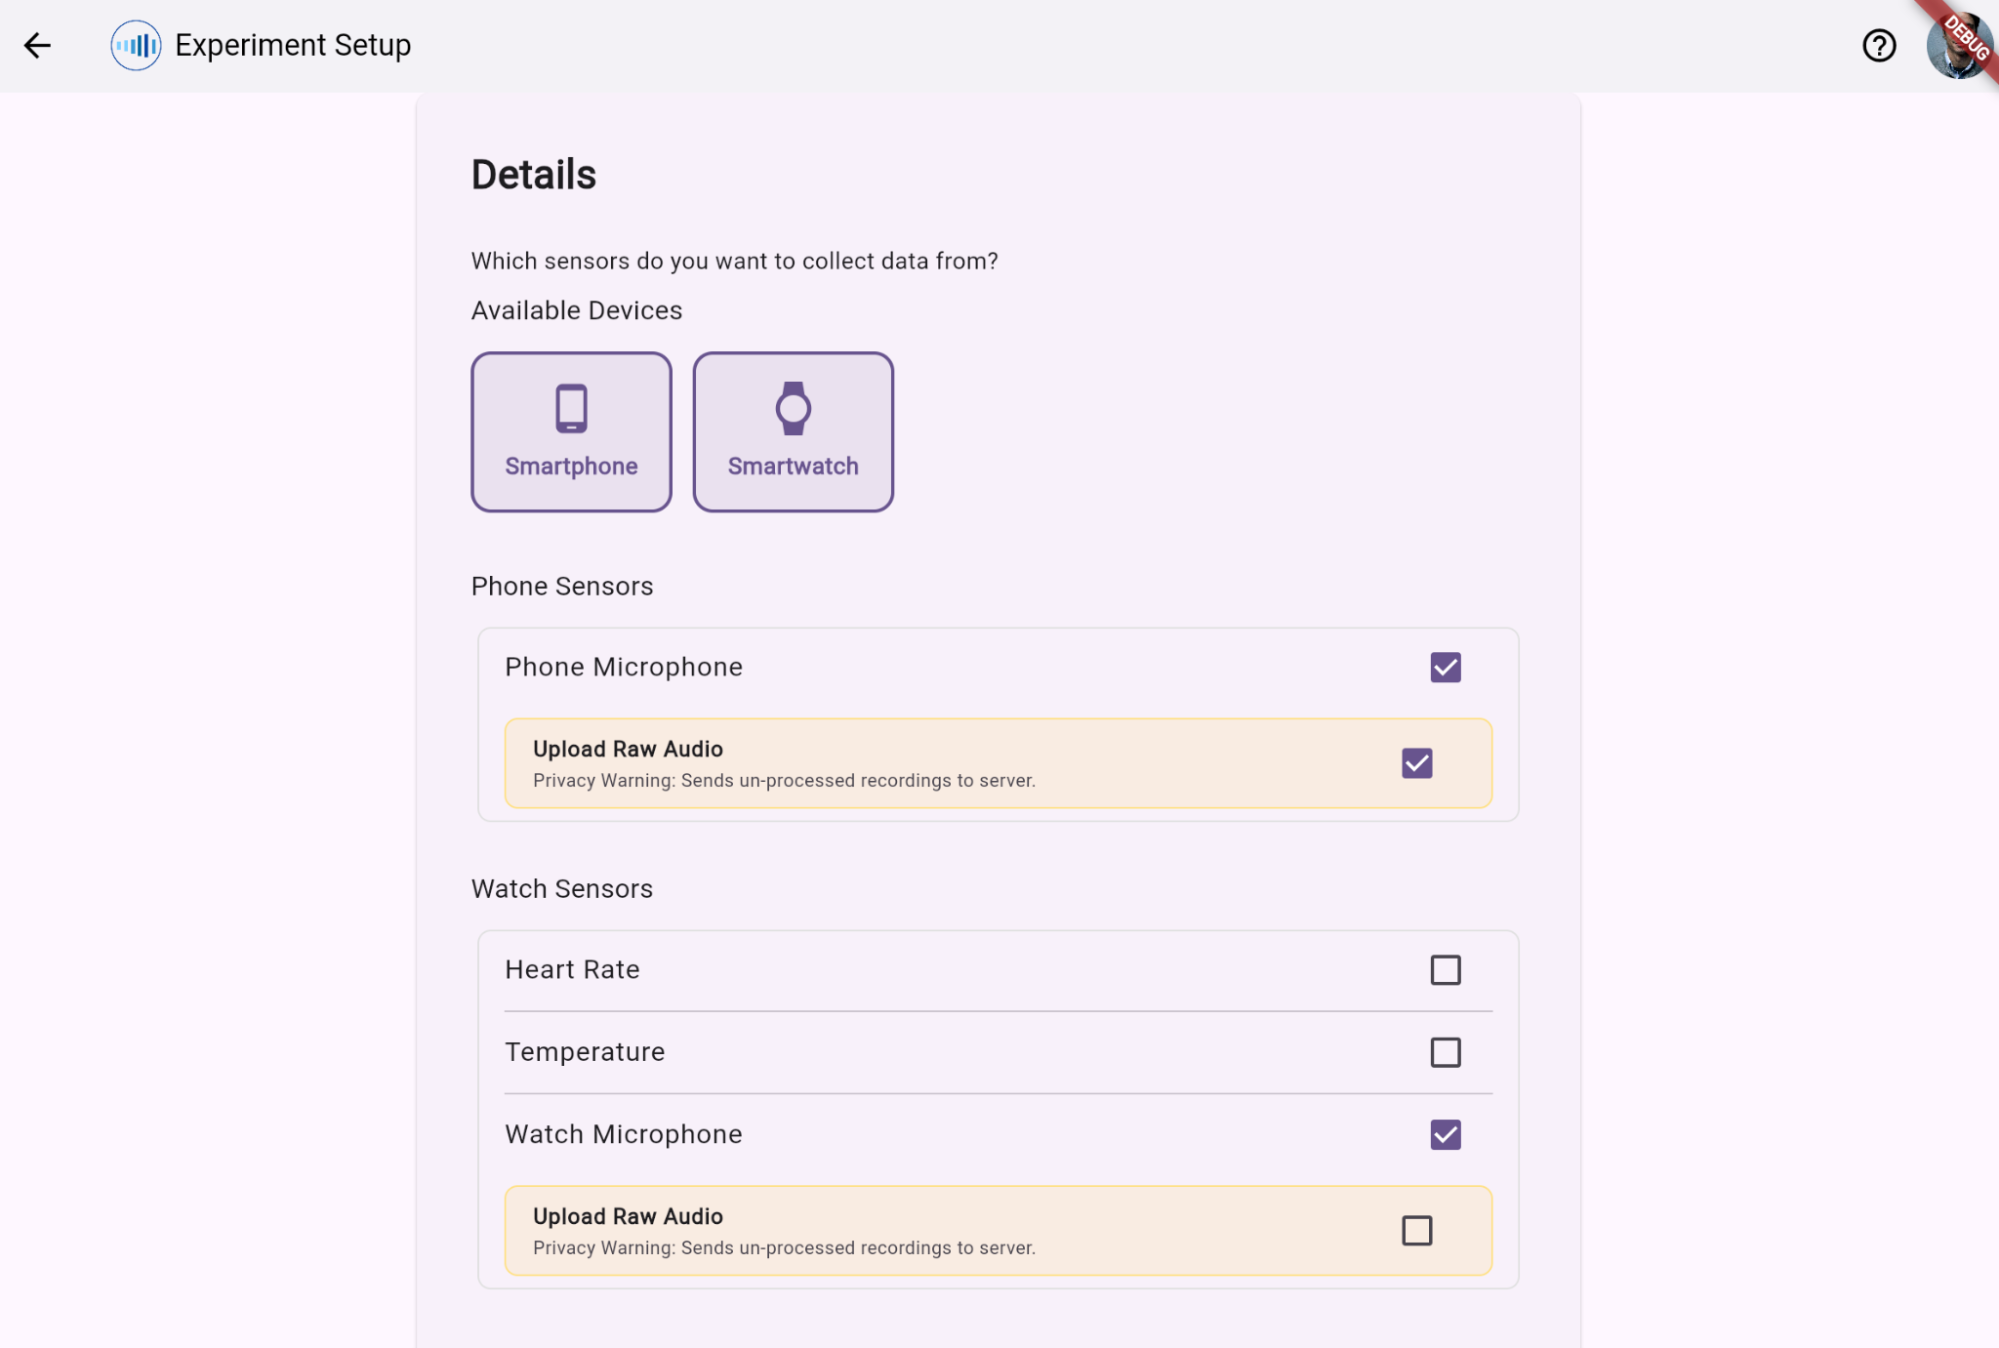
Step 5: Configure Sensor Details
Enable or disable independent tracking for Smartphone and Smartwatch hardware layers. You can specify a custom sampling frequency (Hz) for physiological sensors and explicitly opt-in to Upload Raw Audio (privacy warning: sends un-processed audio streams directly to cloud storage).
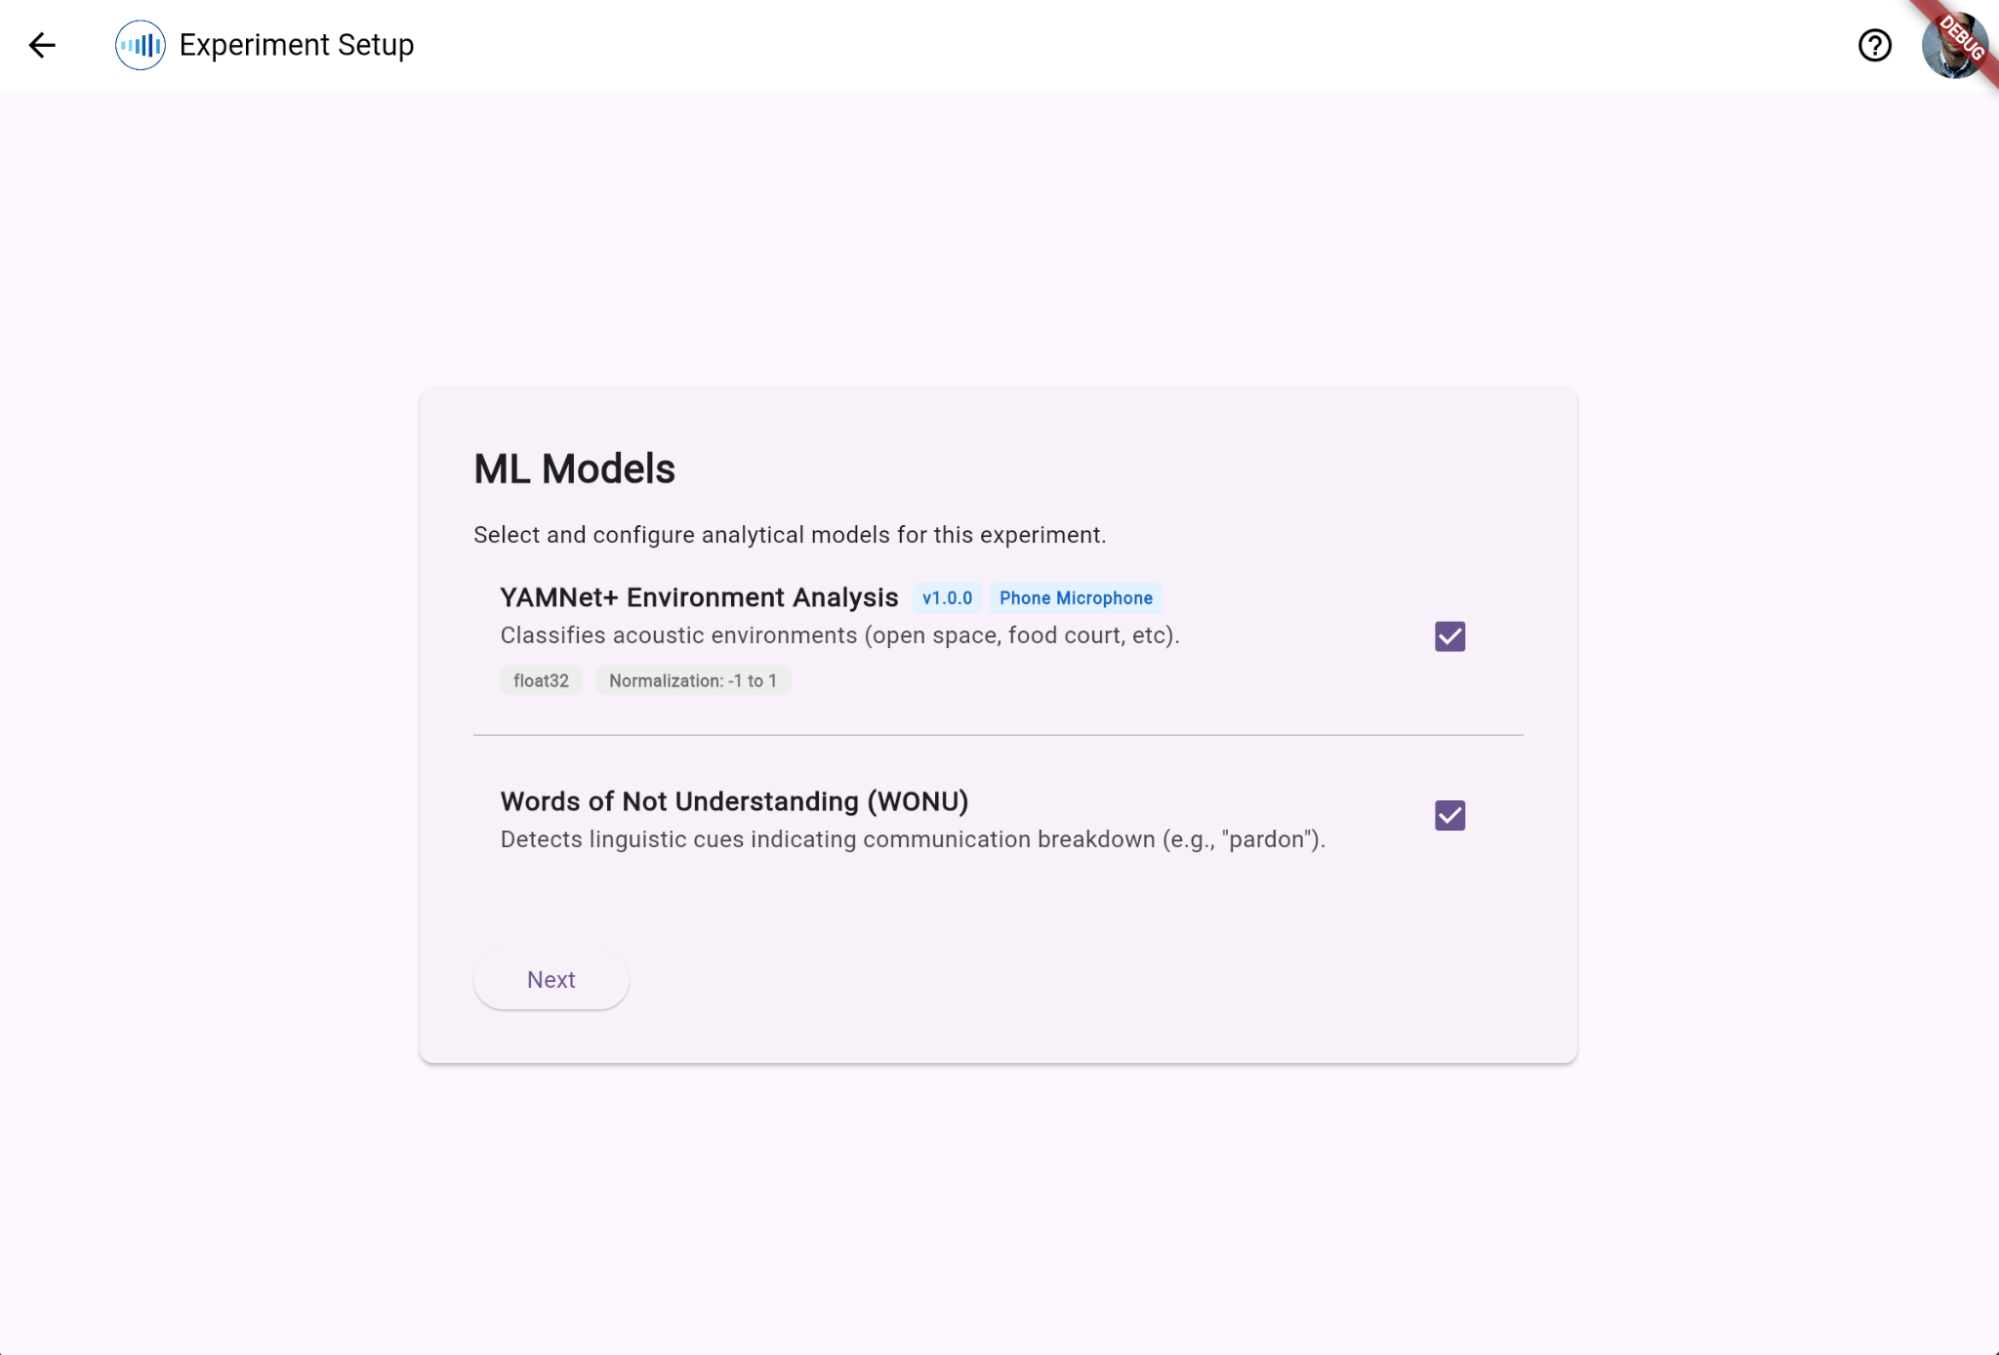
Step 6: Select ML Models
Select and configure on-device analytical models for the experiment: - YAMNet+ Environment Analysis: Classifies real-time acoustic environments (e.g., open space, food court) using normalized float32 input buffers. - Words of Not Understanding (WONU): Detects spoken linguistic cues (e.g., “pardon?”, “sorry, what?”) signaling a communication breakdown.
Step 7: Define Automation Triggers
Build rule-based triggers automating model inference and user prompt generation using the visual builder:
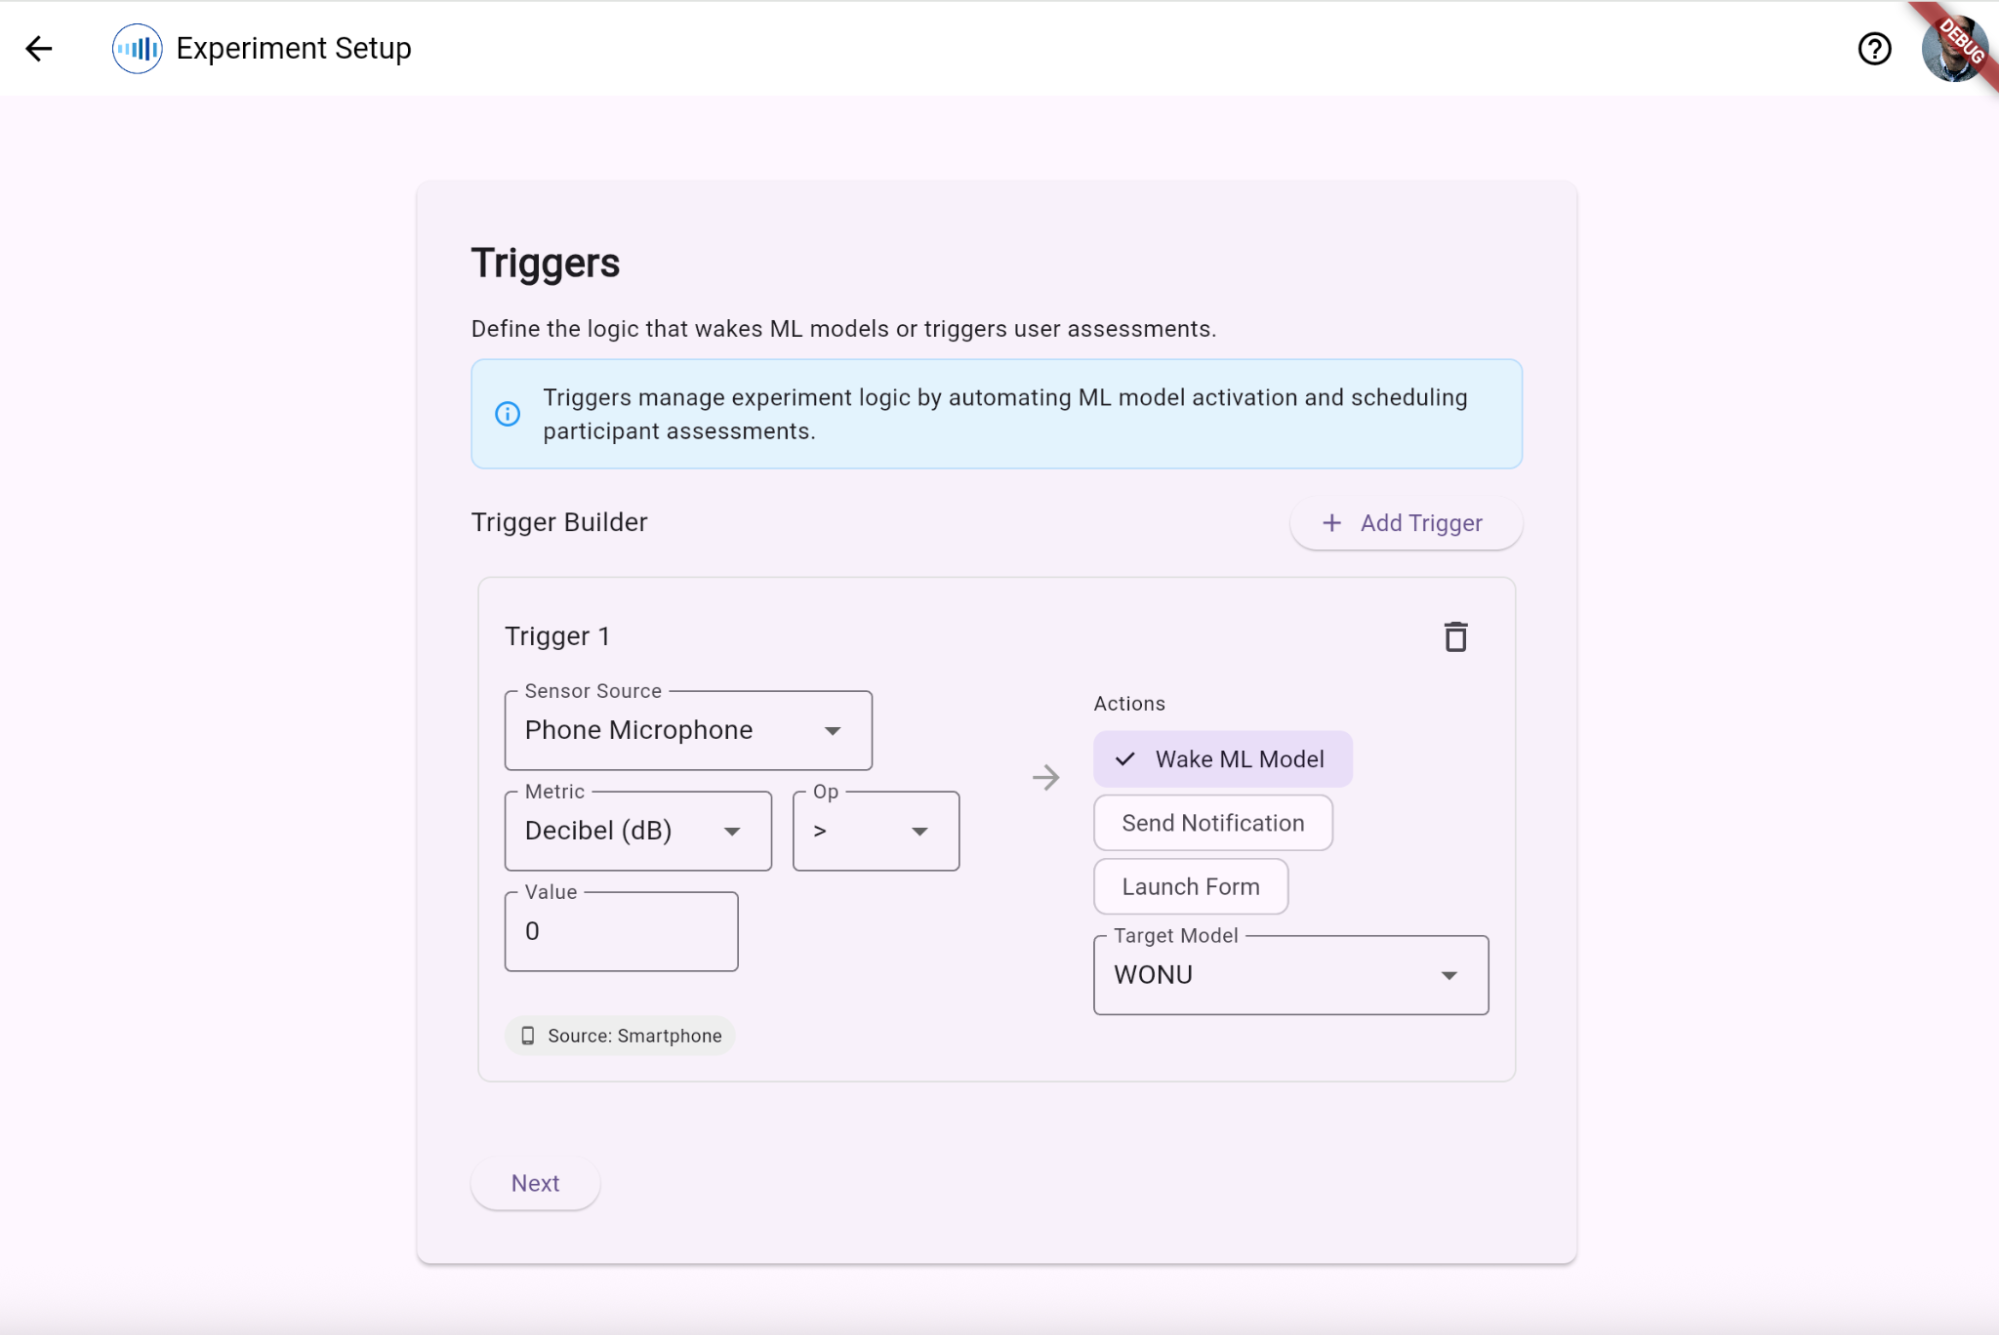
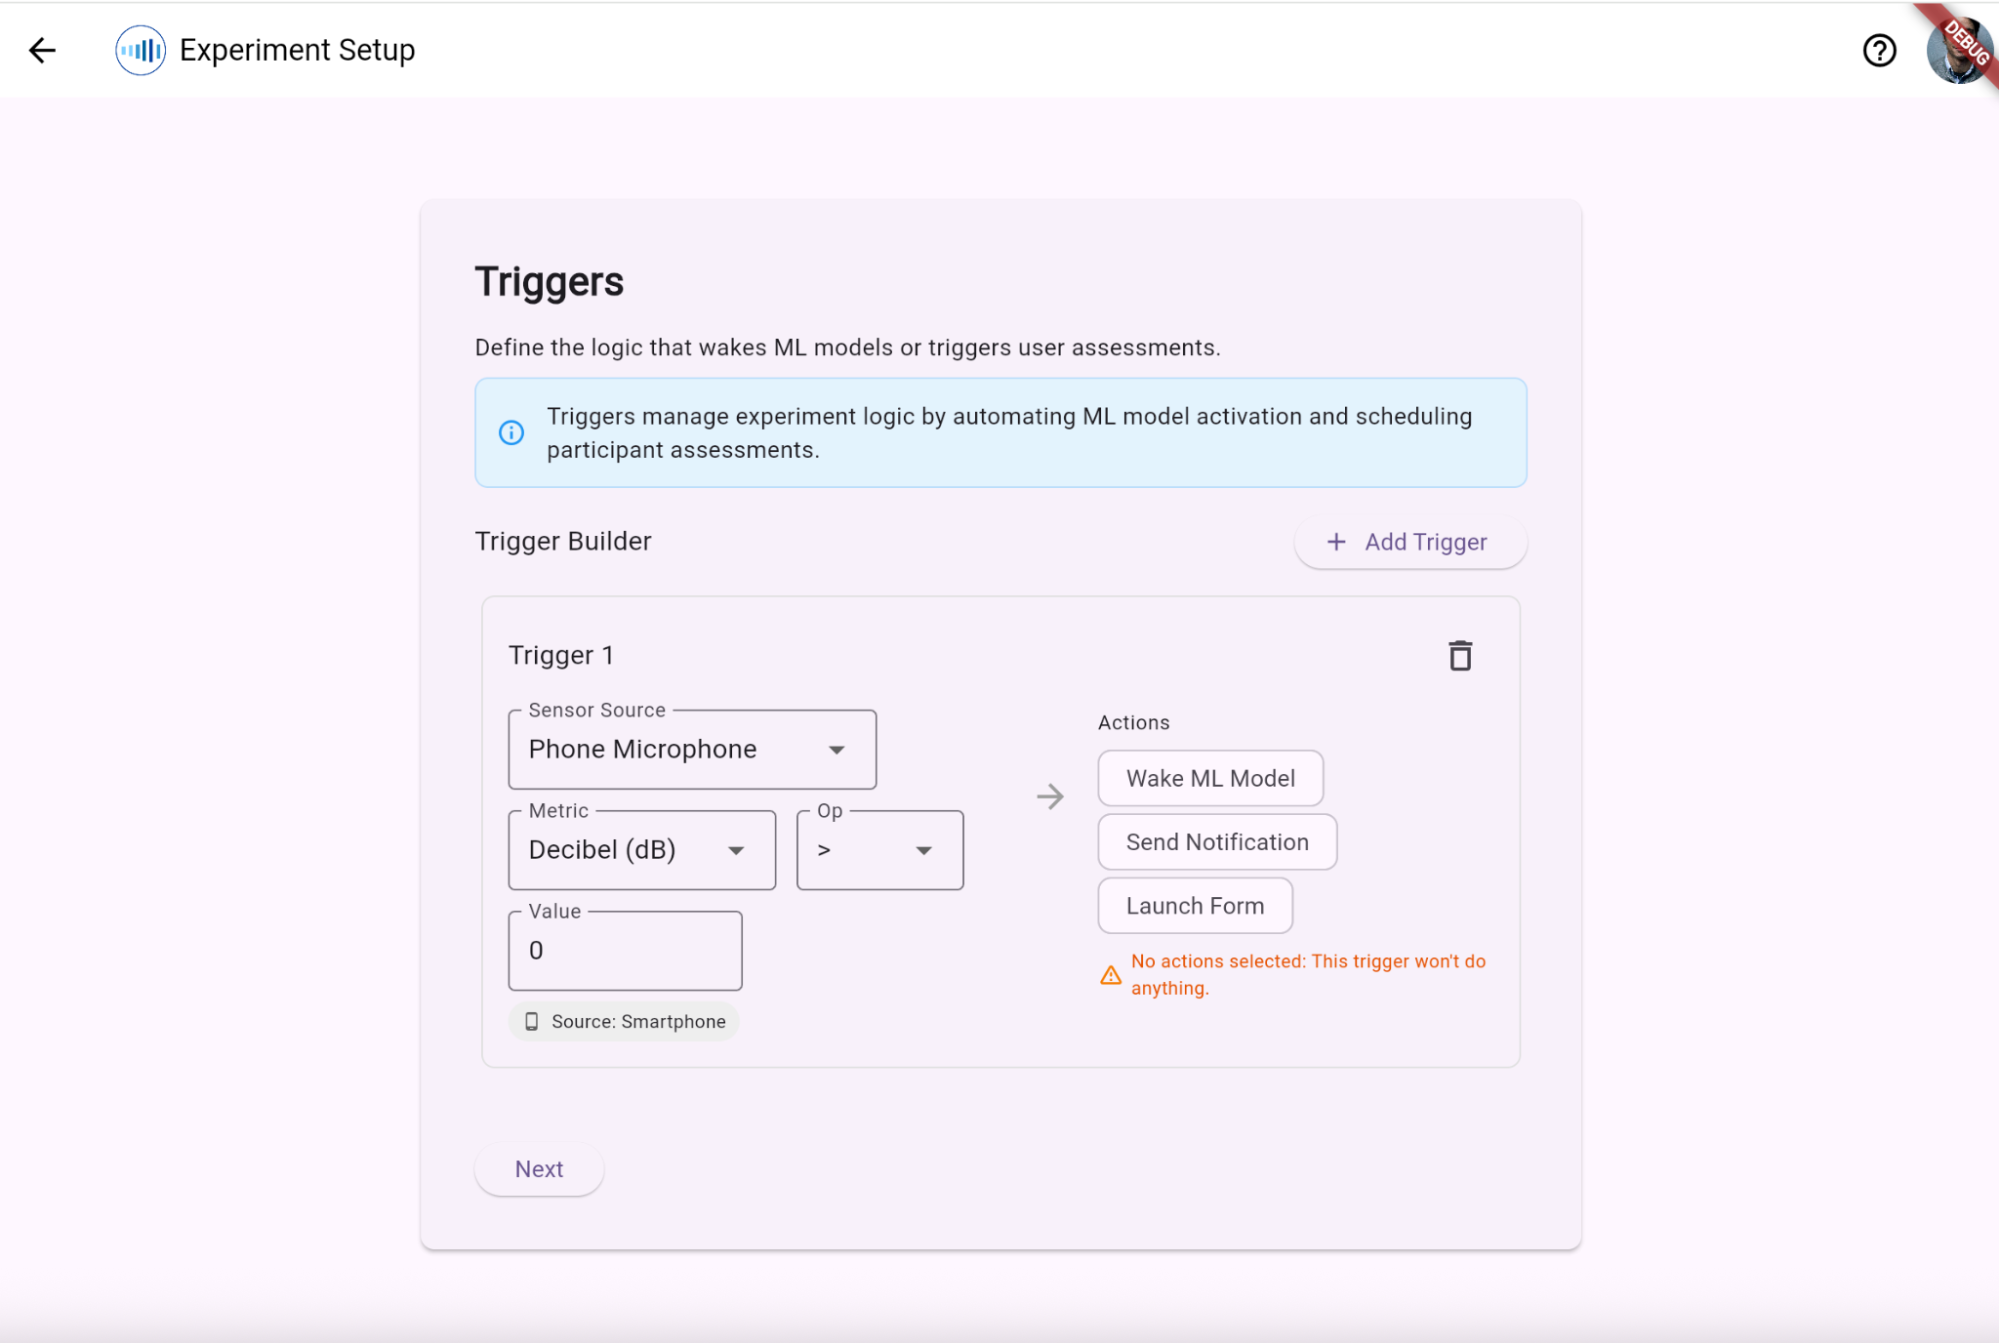
Sensor Lists
| Sensor Source (Input) | Allowed Metrics (Units) | Allowed Operators | Compatible Target Models / Actions | Threshold Guidance |
|---|---|---|---|---|
| Phone Microphone | Decibel (dB) | >, <, = |
Wake YAMNet+ / WONU, or Launch Form | e.g., 0 - 120 dB |
| Watch Microphone | Decibel (dB) | >, <, = |
Wake YAMNet+ / WONU, or Launch Form | e.g., 0 - 120 dB |
| Heart Rate | BPM | >, <, = |
Wake YAMNet+ / WONU, or Launch Form | e.g., 30 - 220 BPM |
| Temperature | Celsius (°C) | >, <, = |
Wake YAMNet+ / WONU, or Launch Form | e.g., -10 - 50 °C |
Step 8: Customise Feedback Buttons
Configure simple categorical labels for ecological momentary self-reports presented to users during an assessment moment (default labels: Good, Okay, Poor).
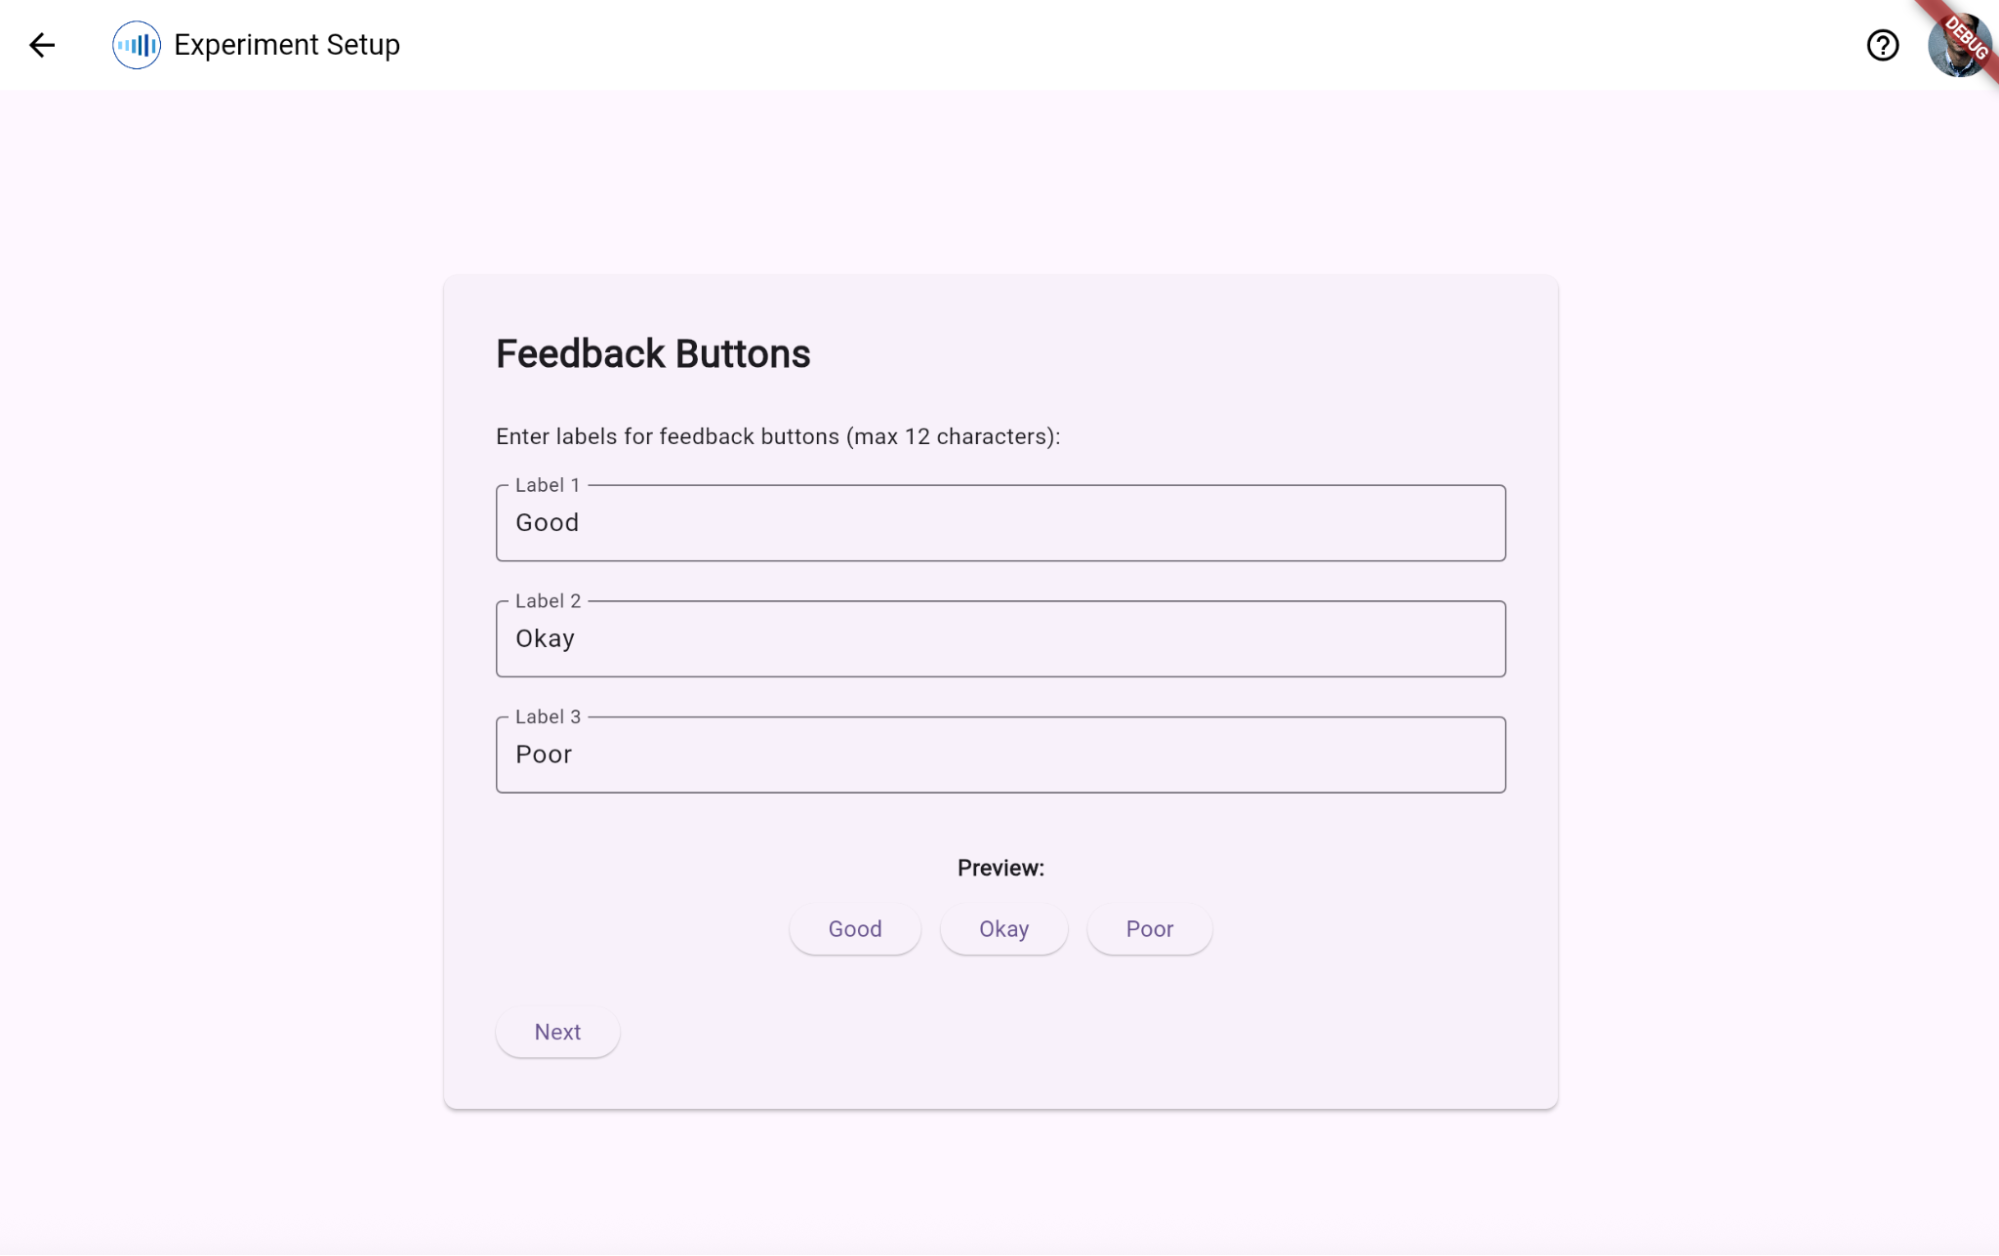
Confirm your feedback buttons.
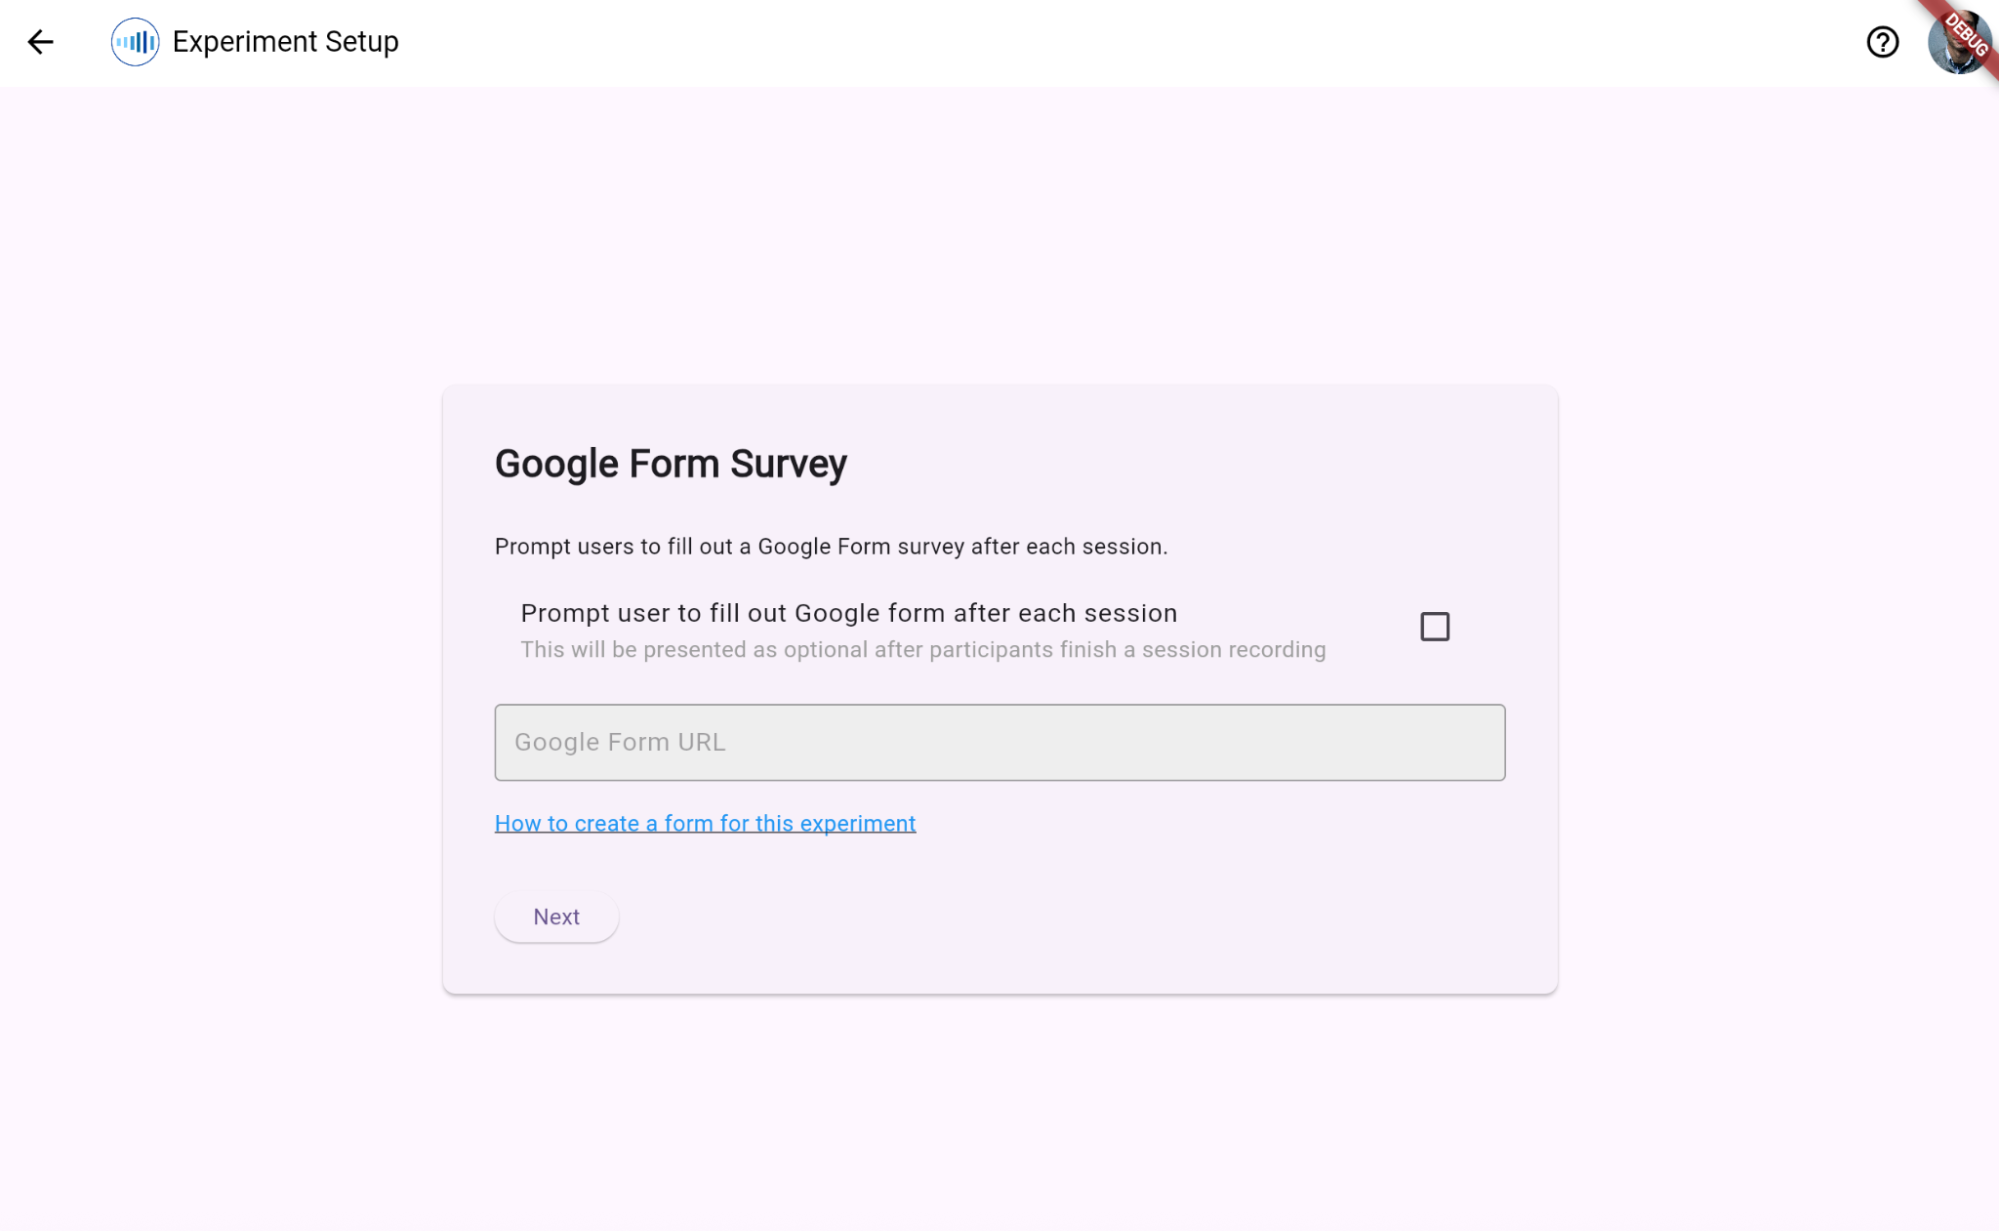
Step 9: (Optional) Add Google Form Survey Link
Prompt users to complete an external web survey (e.g., Google Forms) for deeper subjective commentary following their recording session.
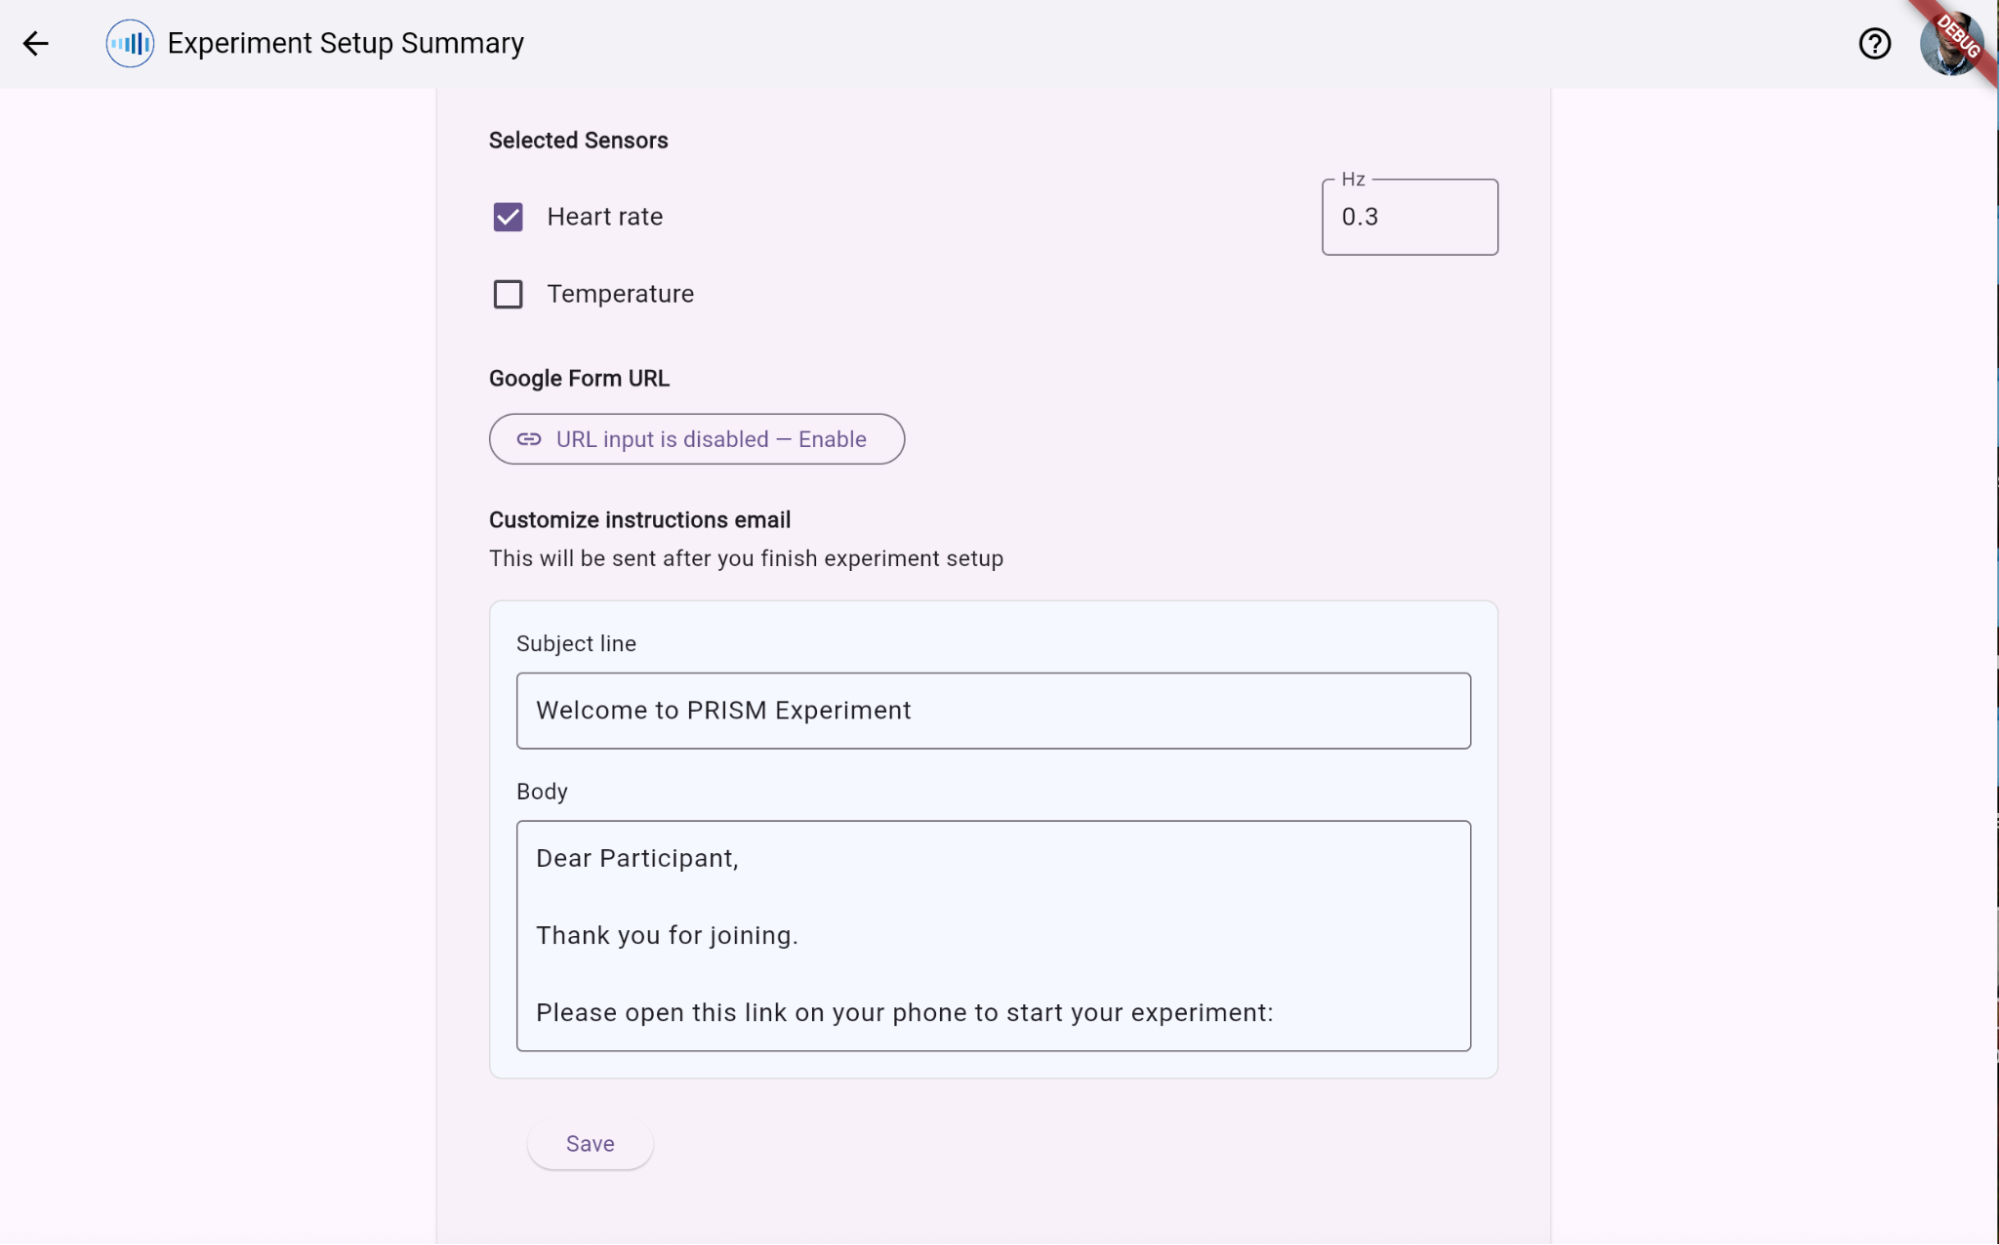
Step 10: Review and Confirm Details
Confirm the summary configuration draft before publishing.
Managing Experiments and Participants
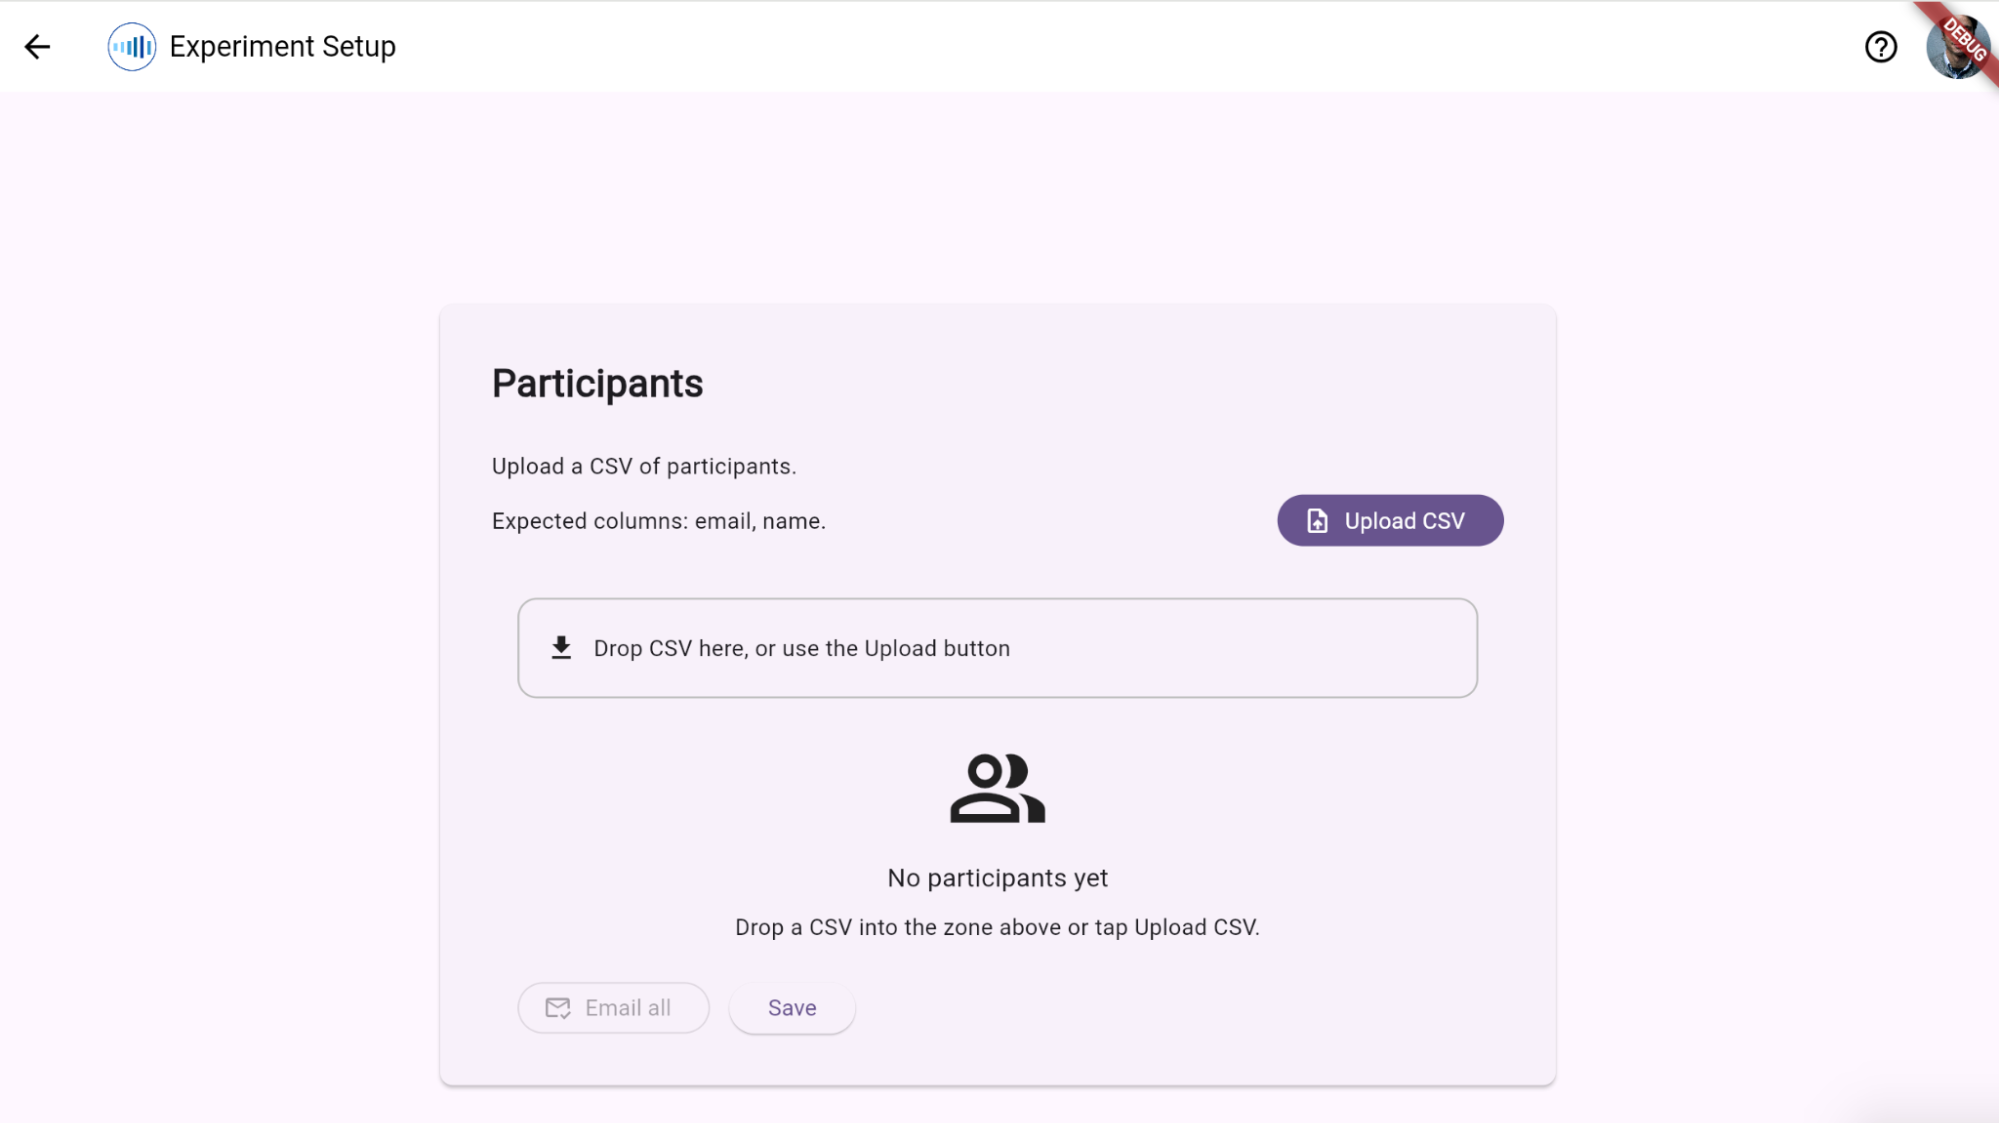
Step 12: View experiments and Add and Manage Participants
When logging in now you will see the experiment cards.
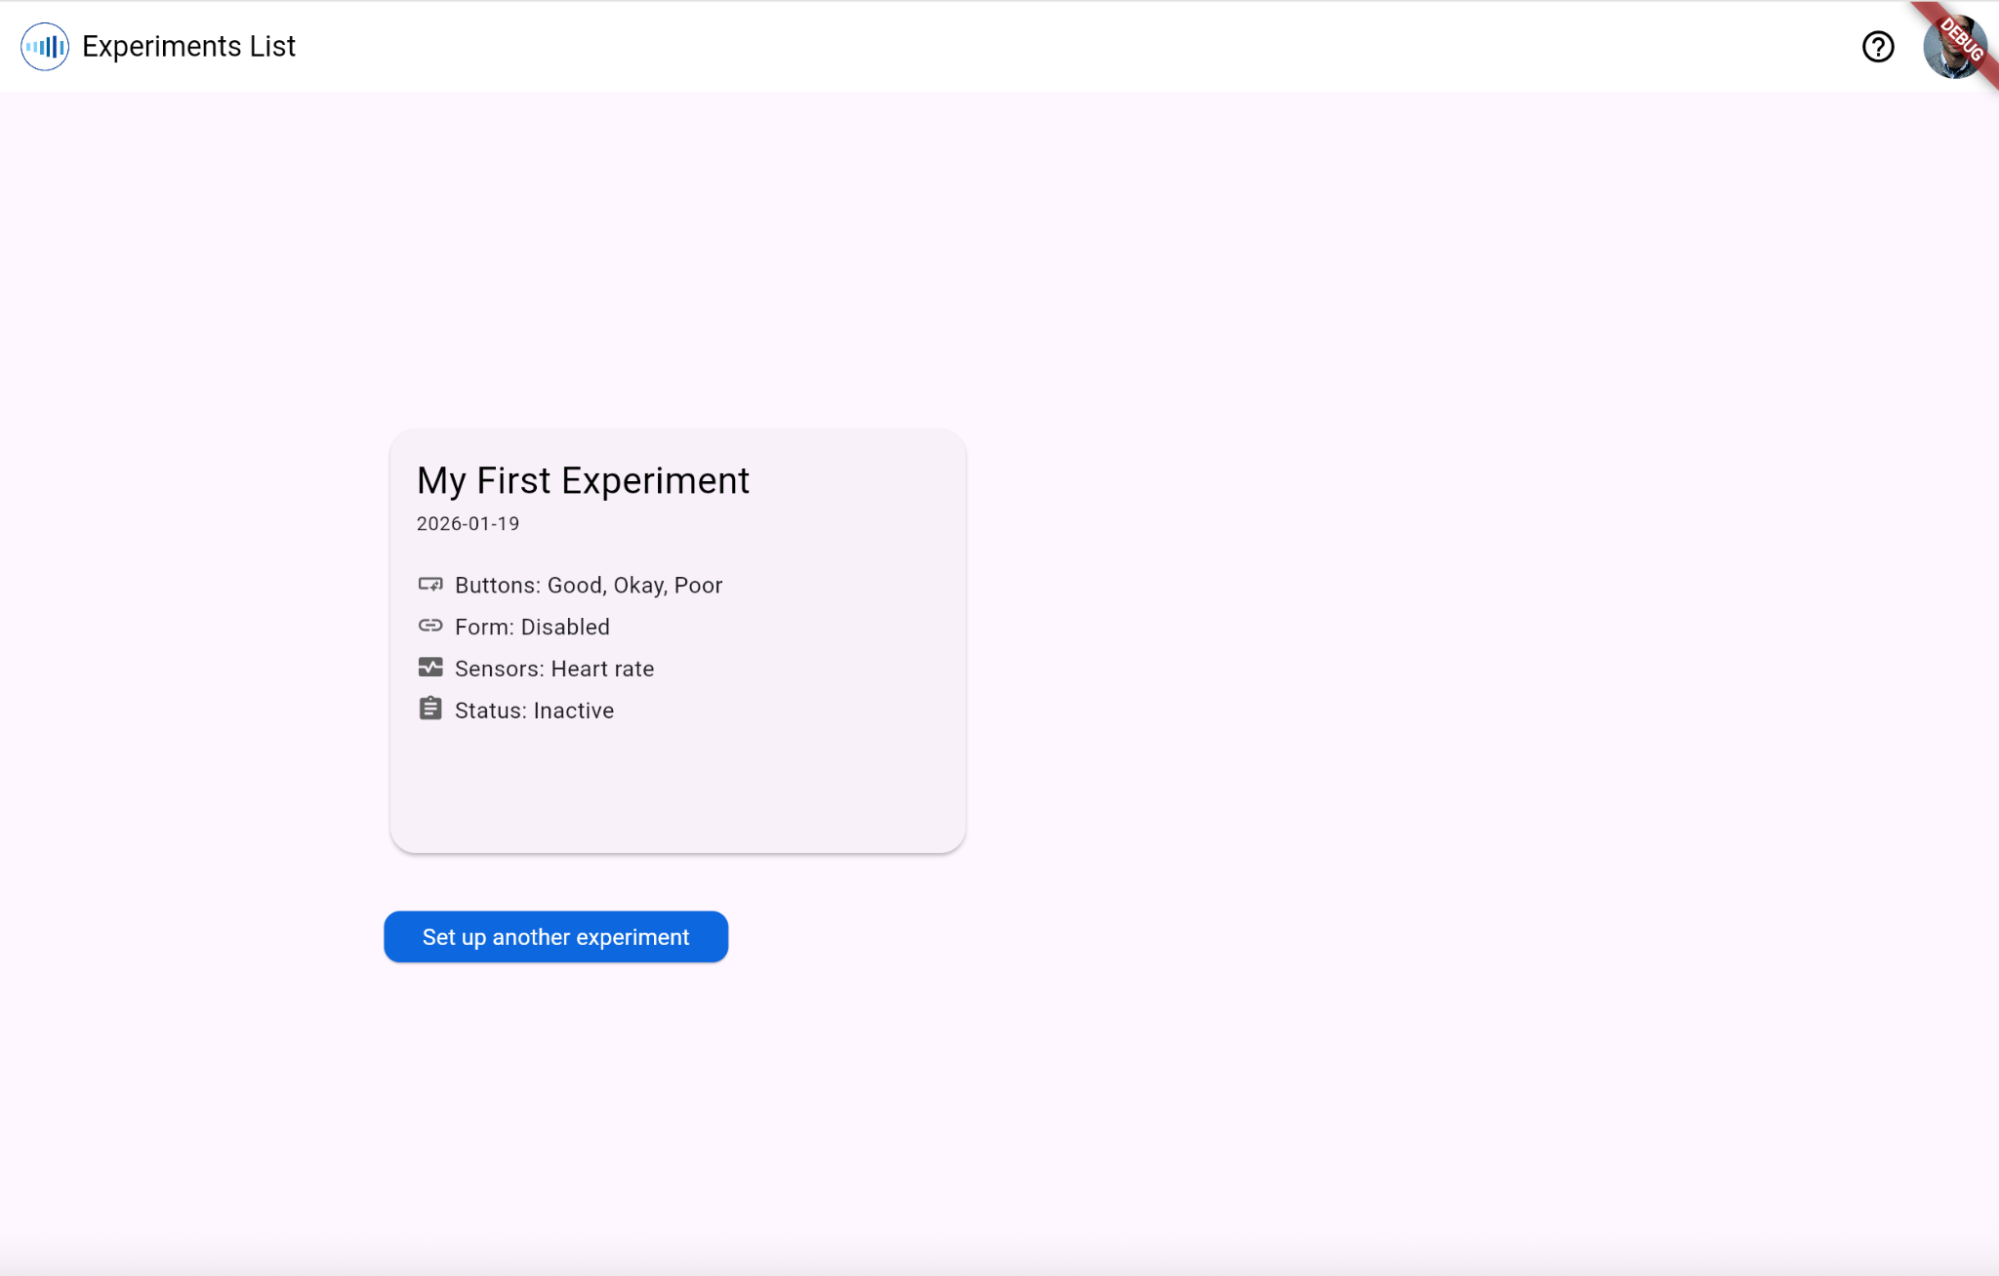
Click “My First Experiment” (or the experiment you want to manage).
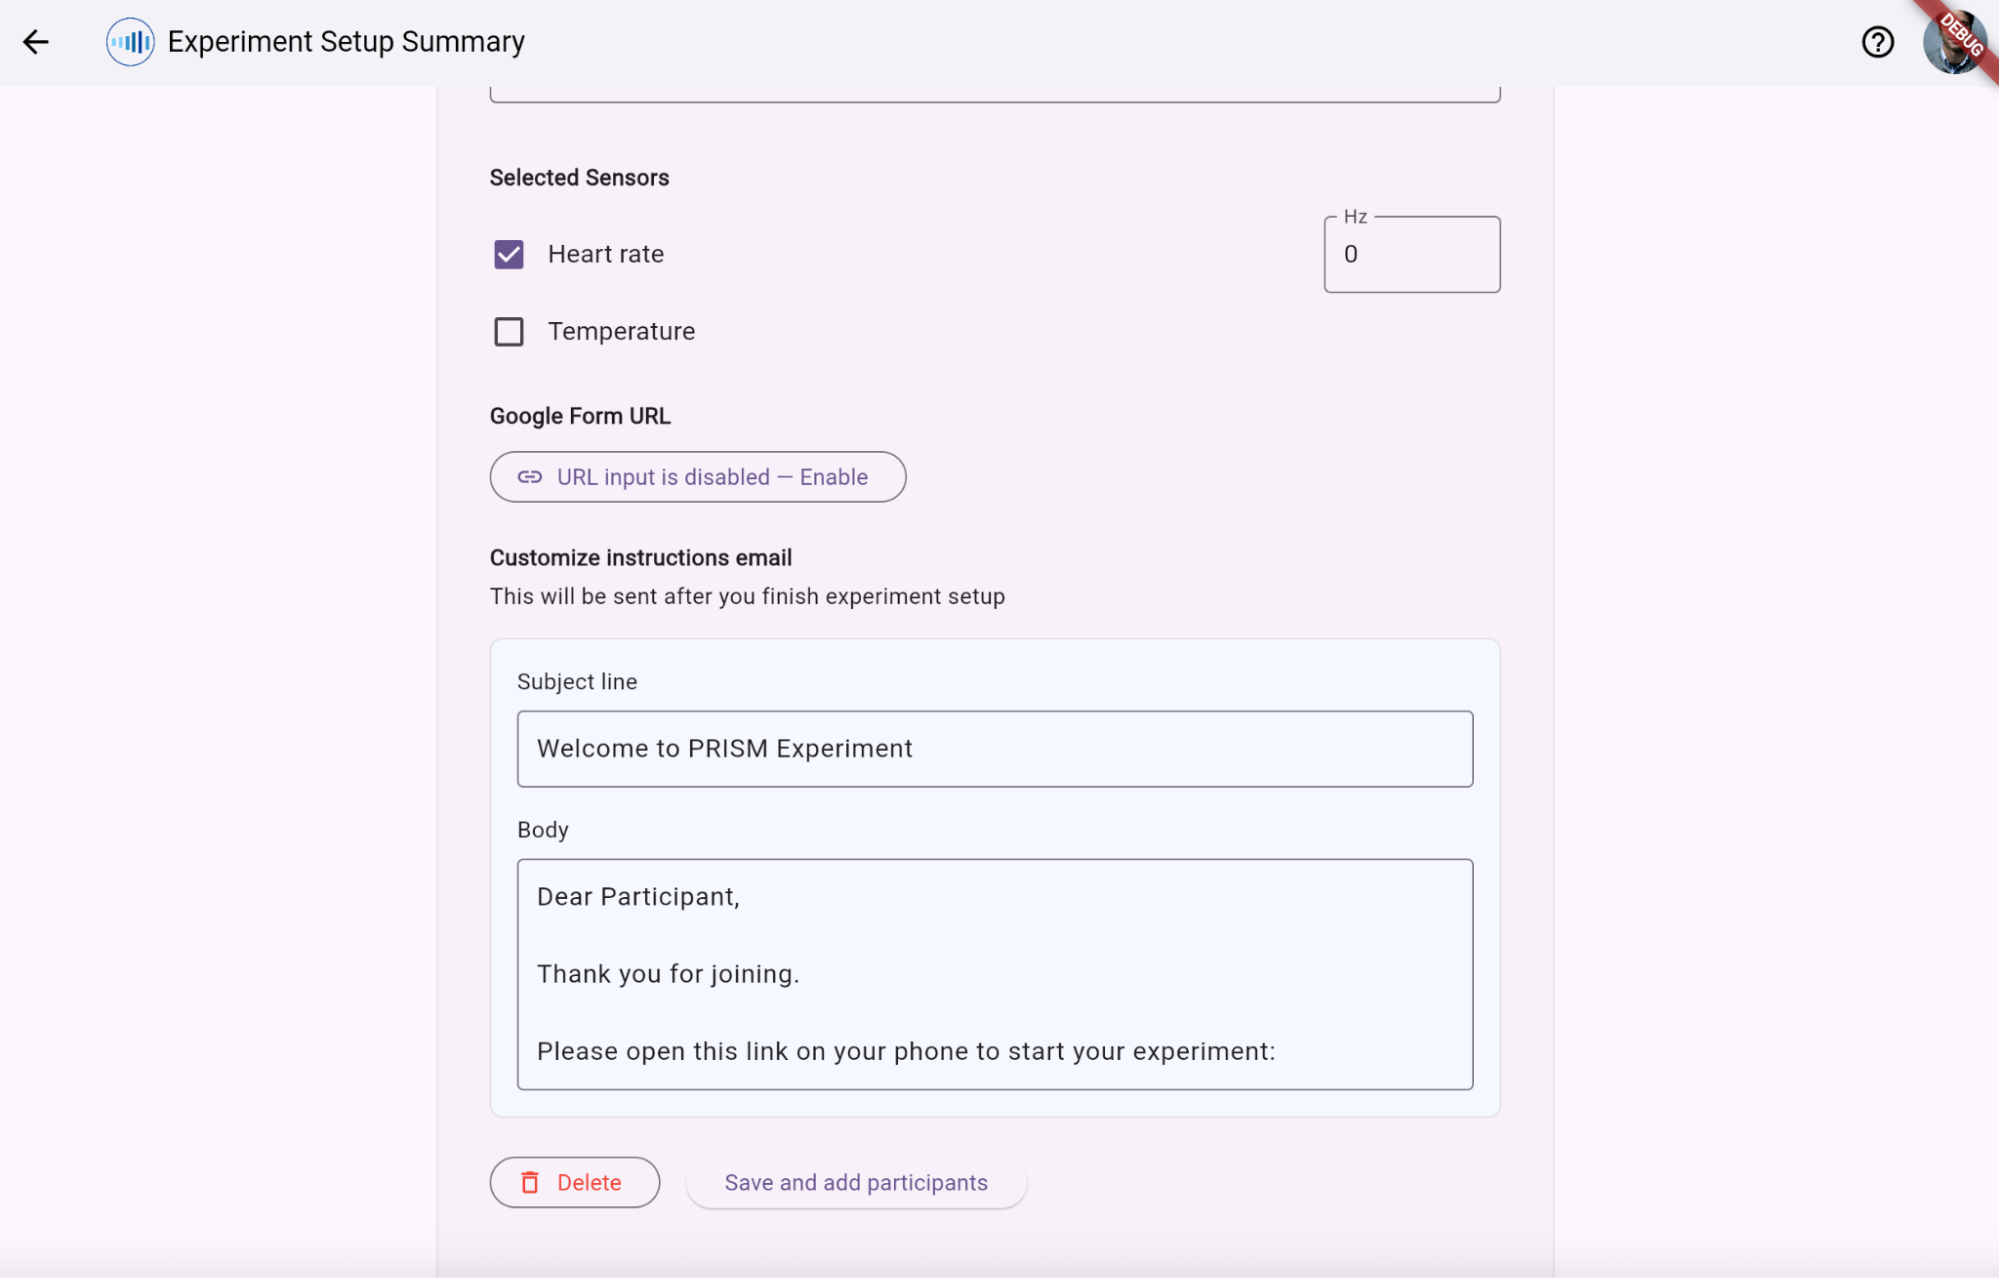
Confirm it by clicking “Save and add participants”.
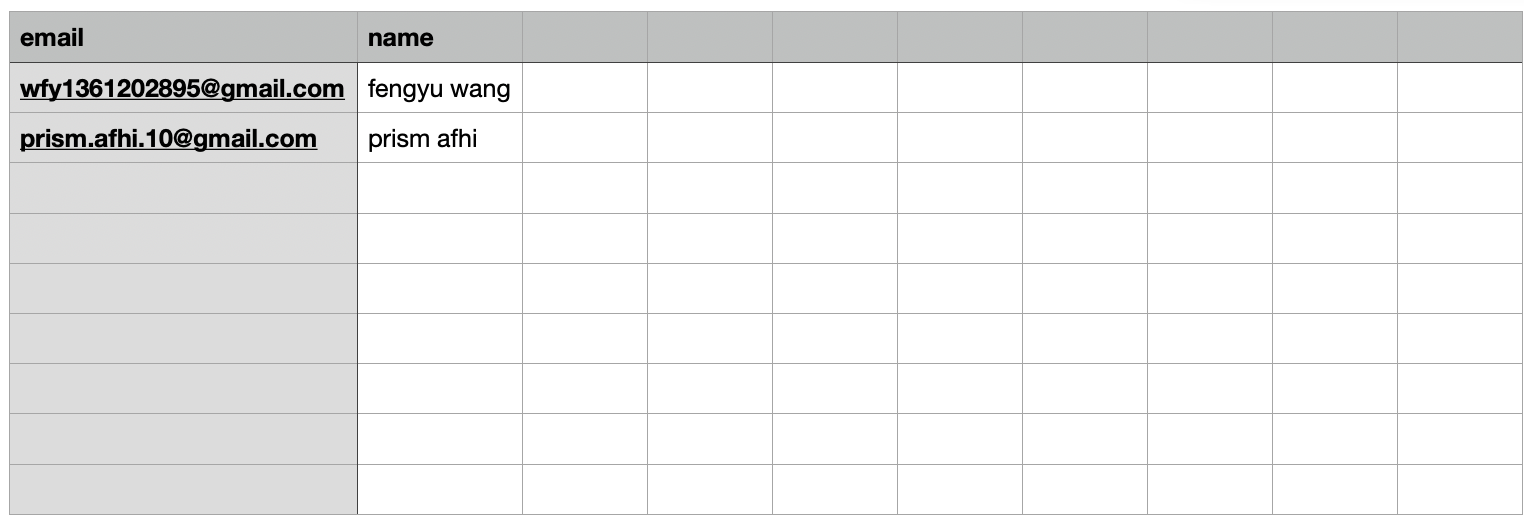
Example CSV file formatting (expected columns: email, name):
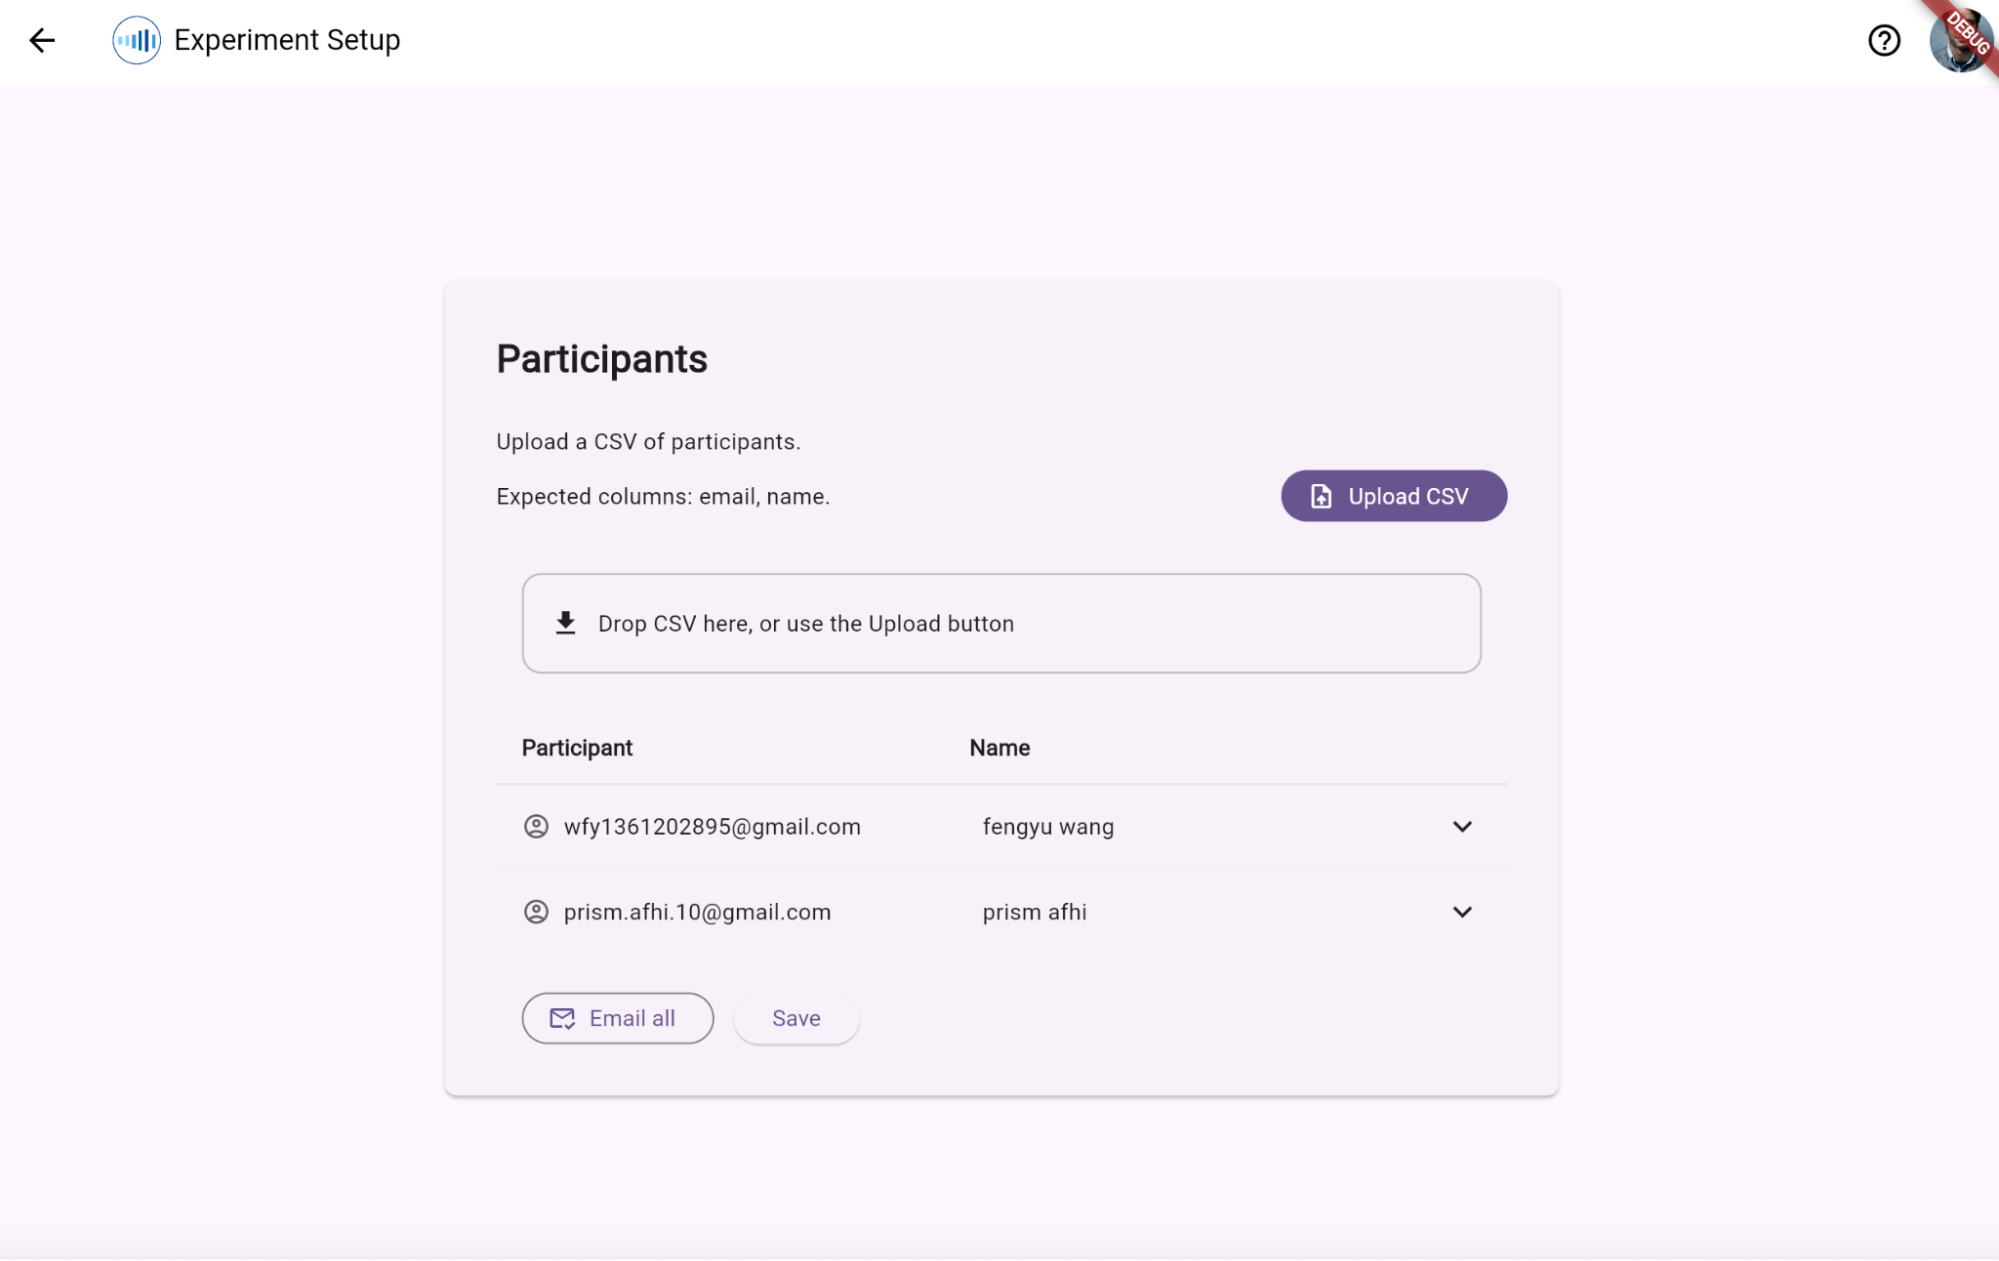
Drag your csv file then you should be able to see participants. Once loaded, researchers can trigger batch email invitations to all assigned members.
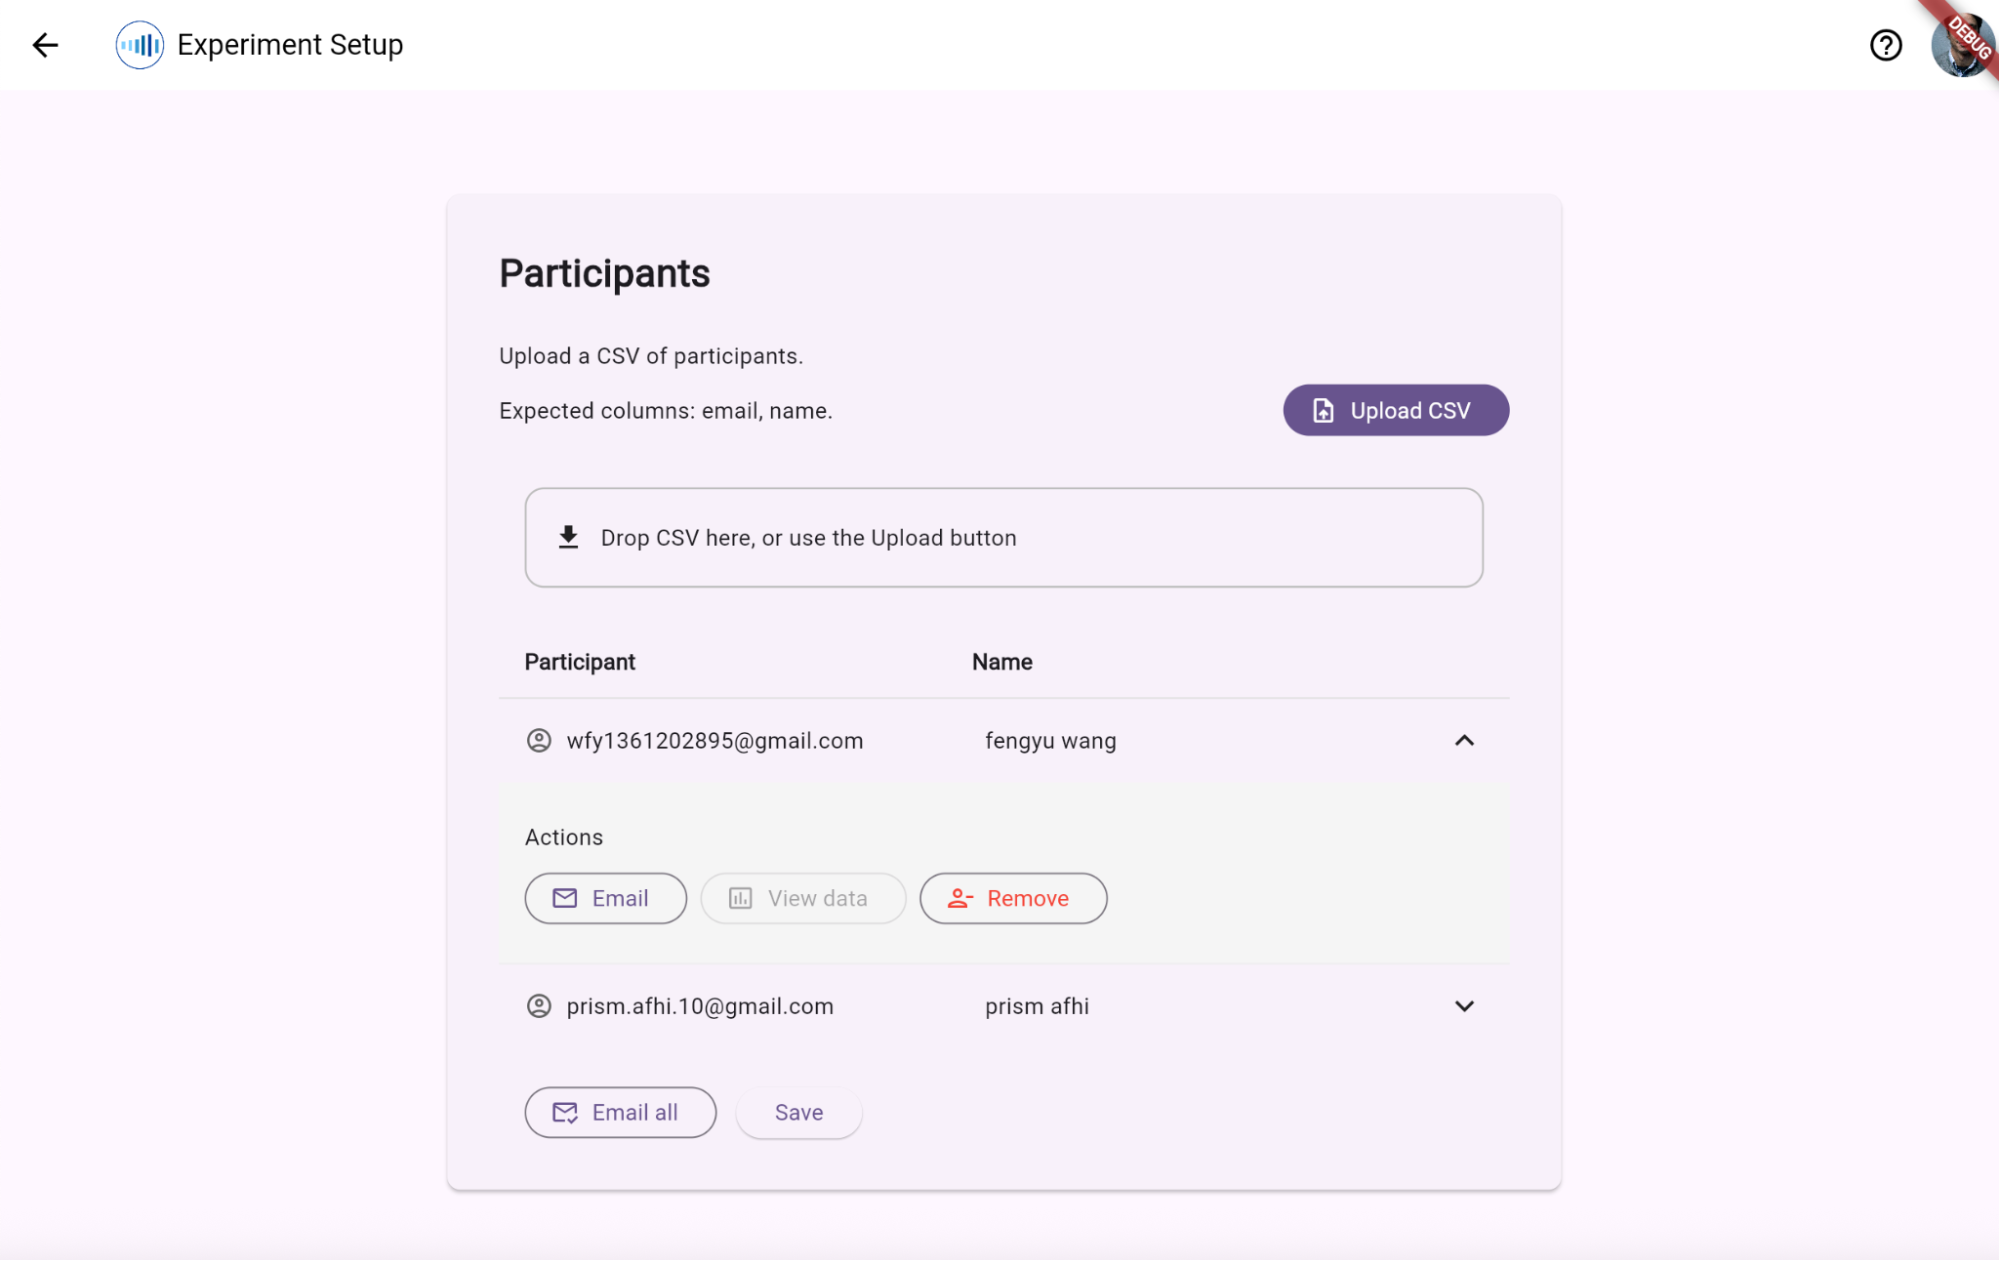
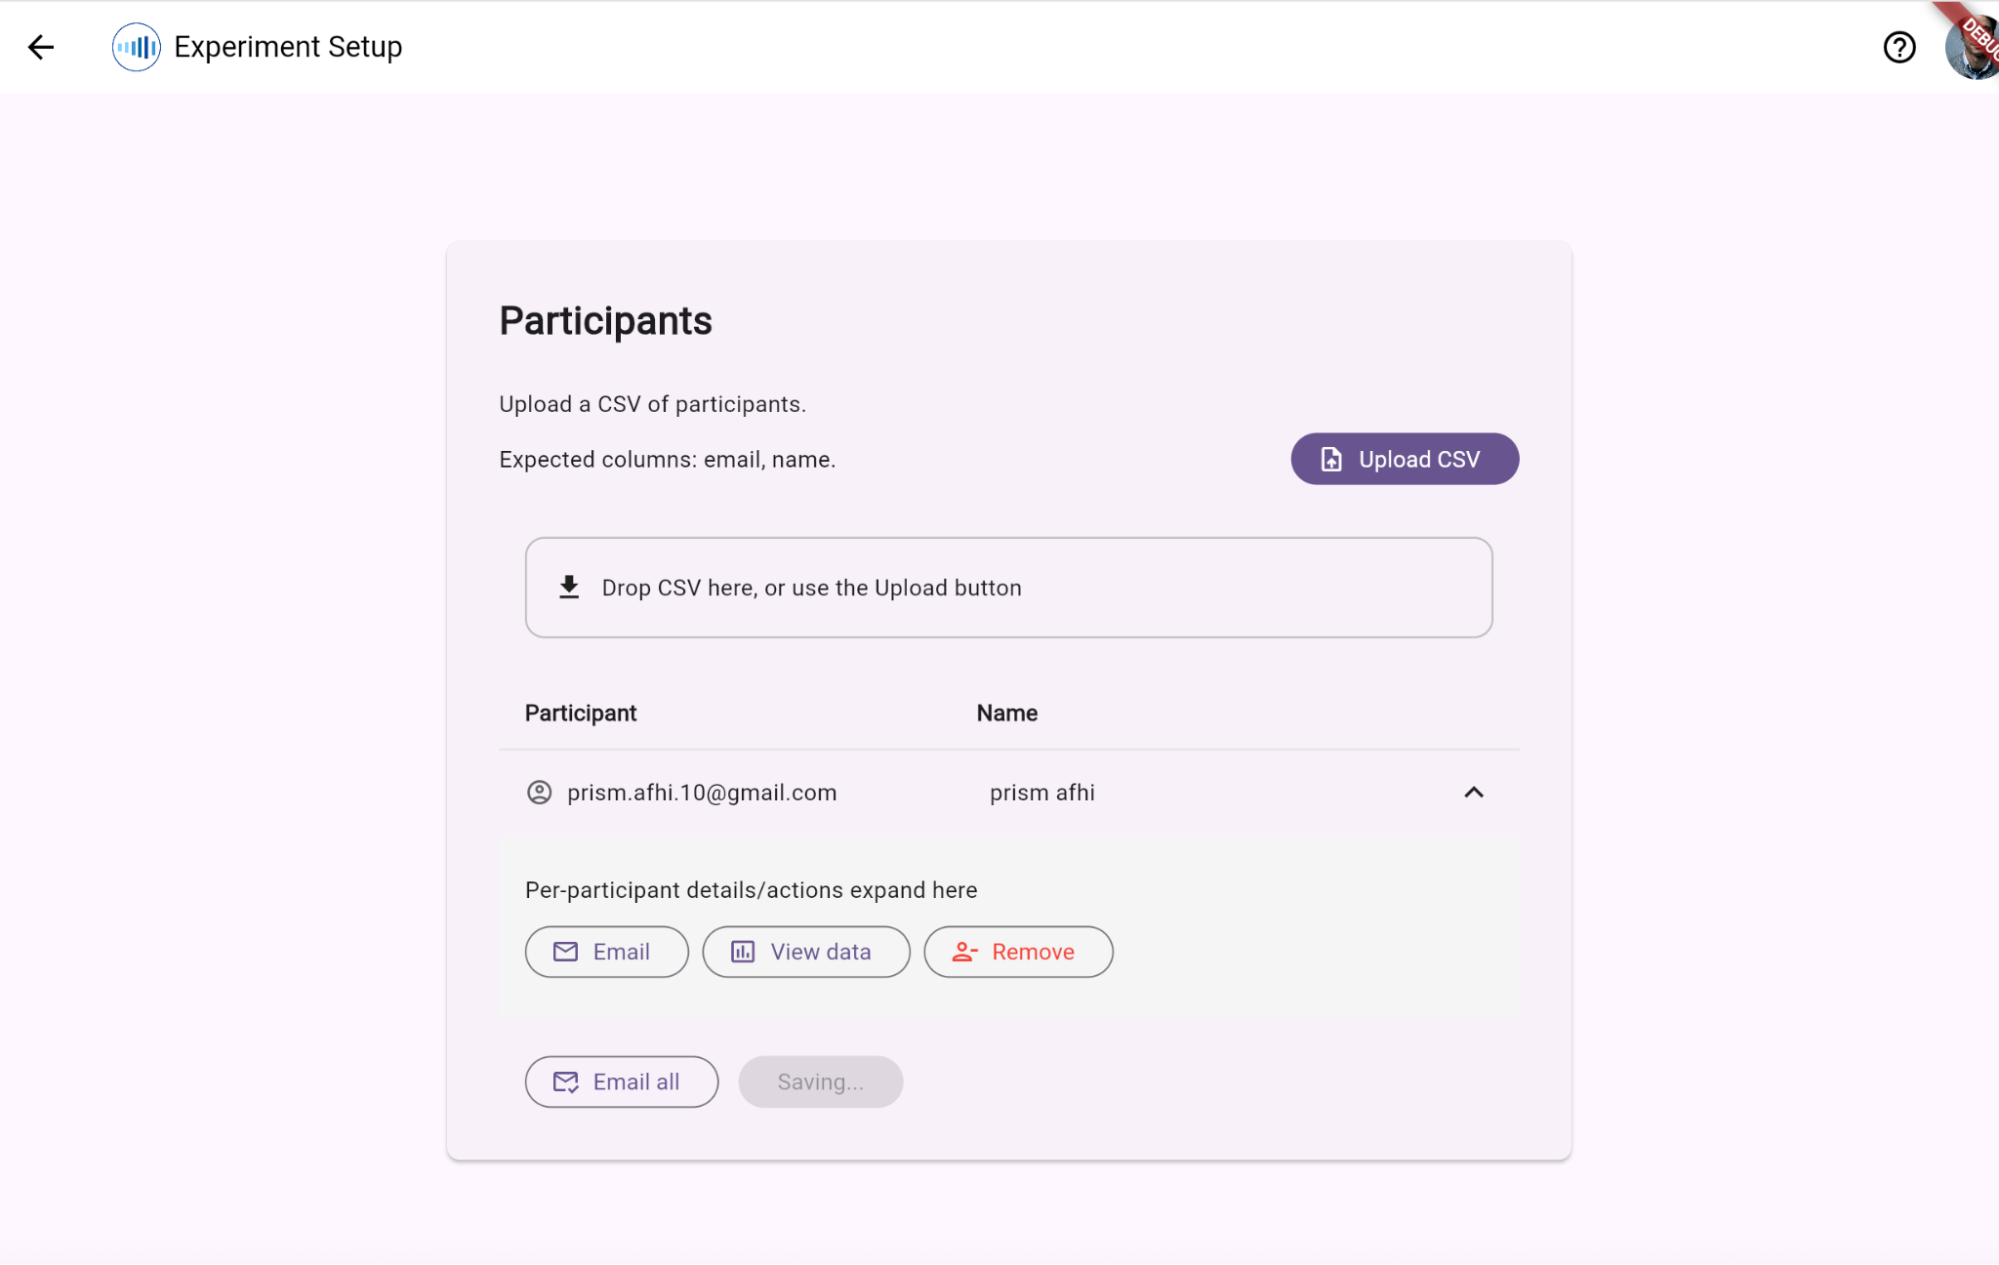
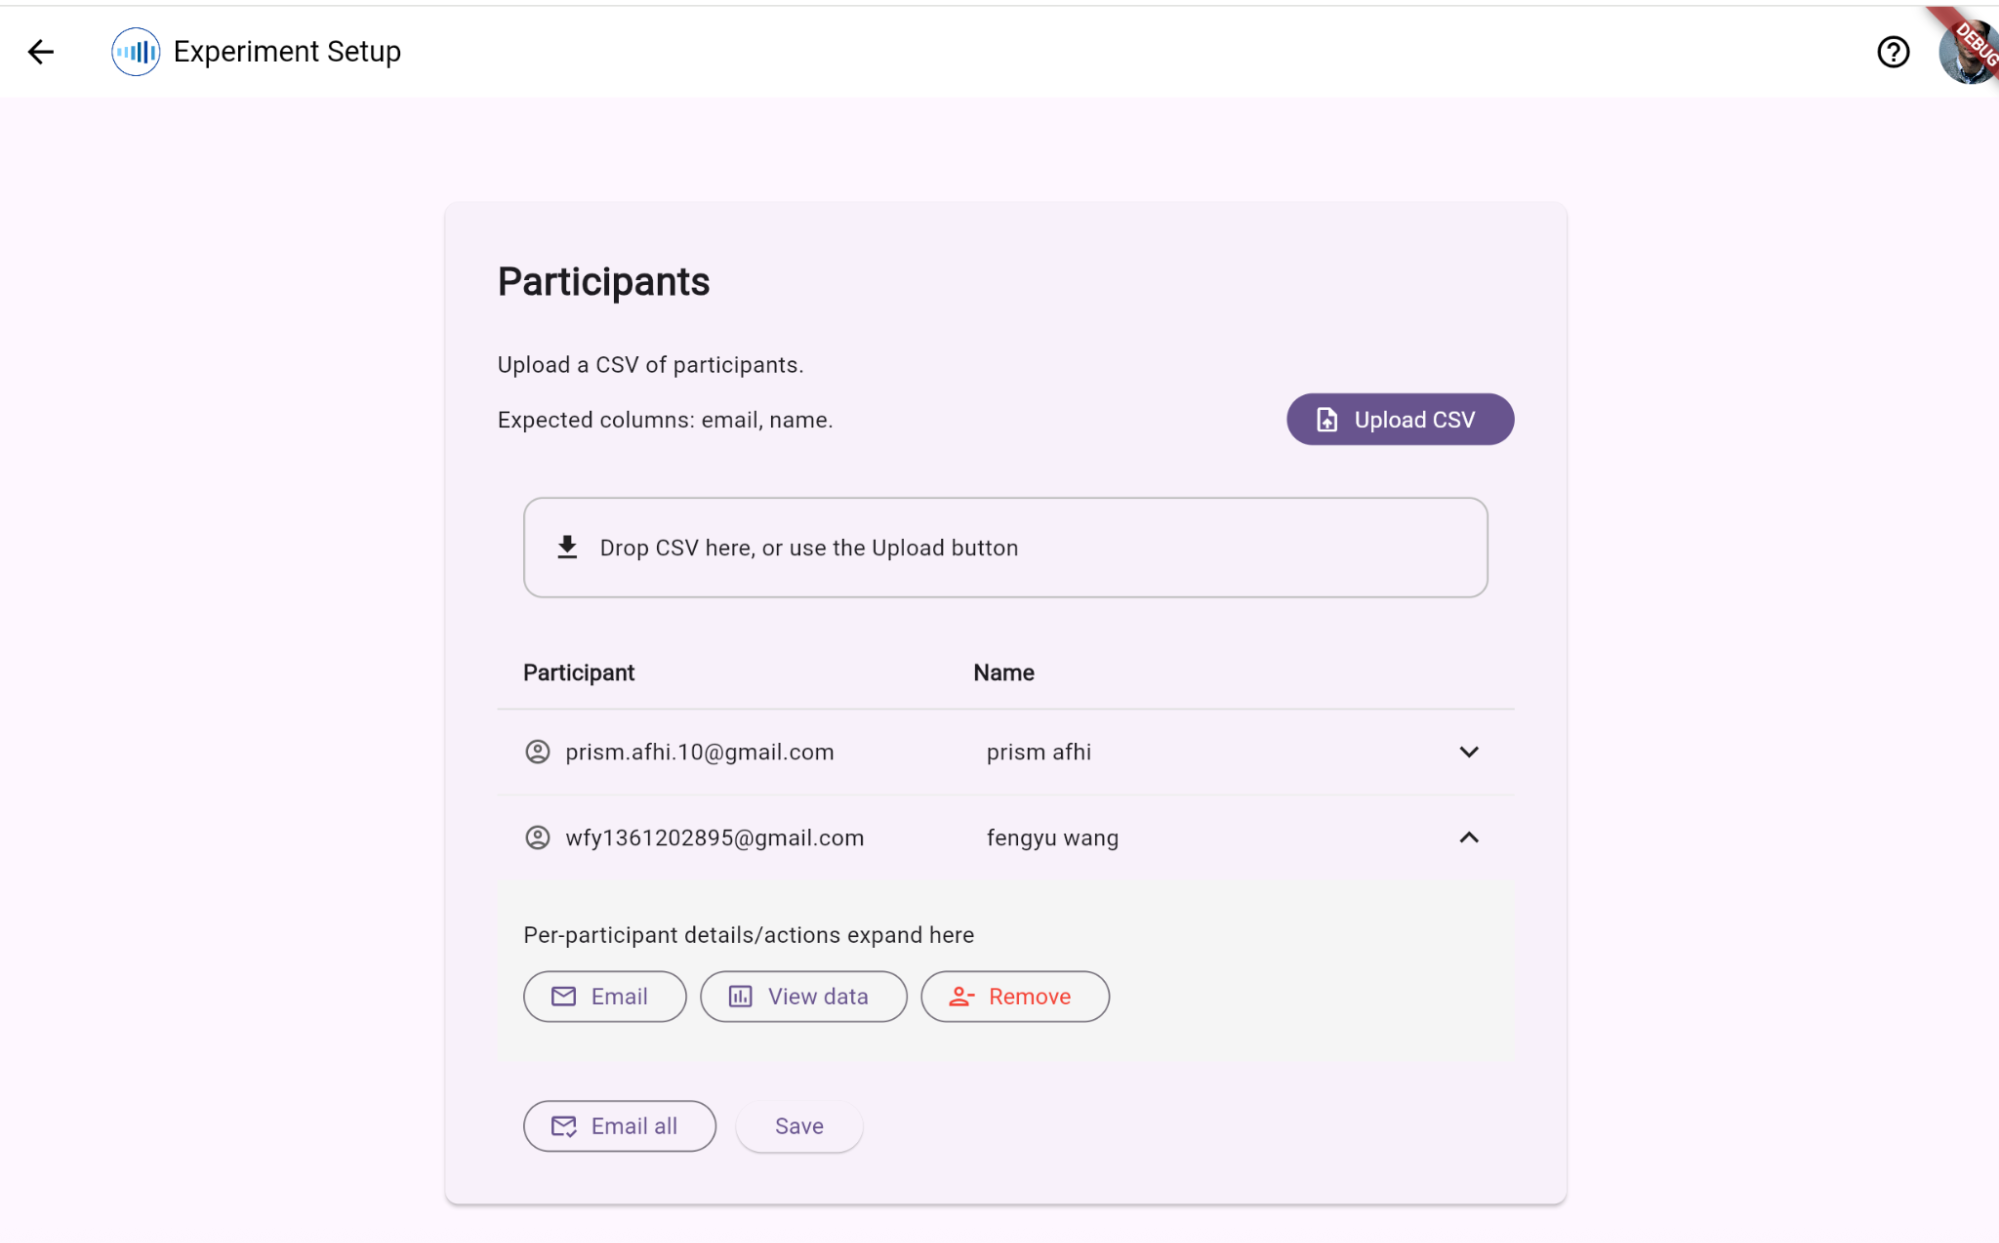
You can edit participants by clicking on it and you should be able to see “Email”, “View data”, “Remove”. Note: Here the “View data” is disabled, that’s because there’s no response for that participant yet. Removing a participant permanently deletes all associated response records and audio storage payloads.
Click save, it will show “Saving…”. Afterward it will guide you back to the experiment list.
Experiment Deployment
Once you have added participants to the Research Portal and clicked Invite, the PRISM system manages deployment to devices automatically:
- Invitation Email: The backend sends an automated invitation email to each participant.
- Download App: The email instructs the participant to download the PRISM Android/Watch app.
- Activation Link: When the participant clicks the unique invite link on their phone, it registers their participant ID and downloads the experiment’s specific configuration rules (sampling rates, triggers, models) from Firestore to their device. No manual device side setup is required by the researcher.
During & Post-Experiment Monitoring
Step 13: Check Session Recordings
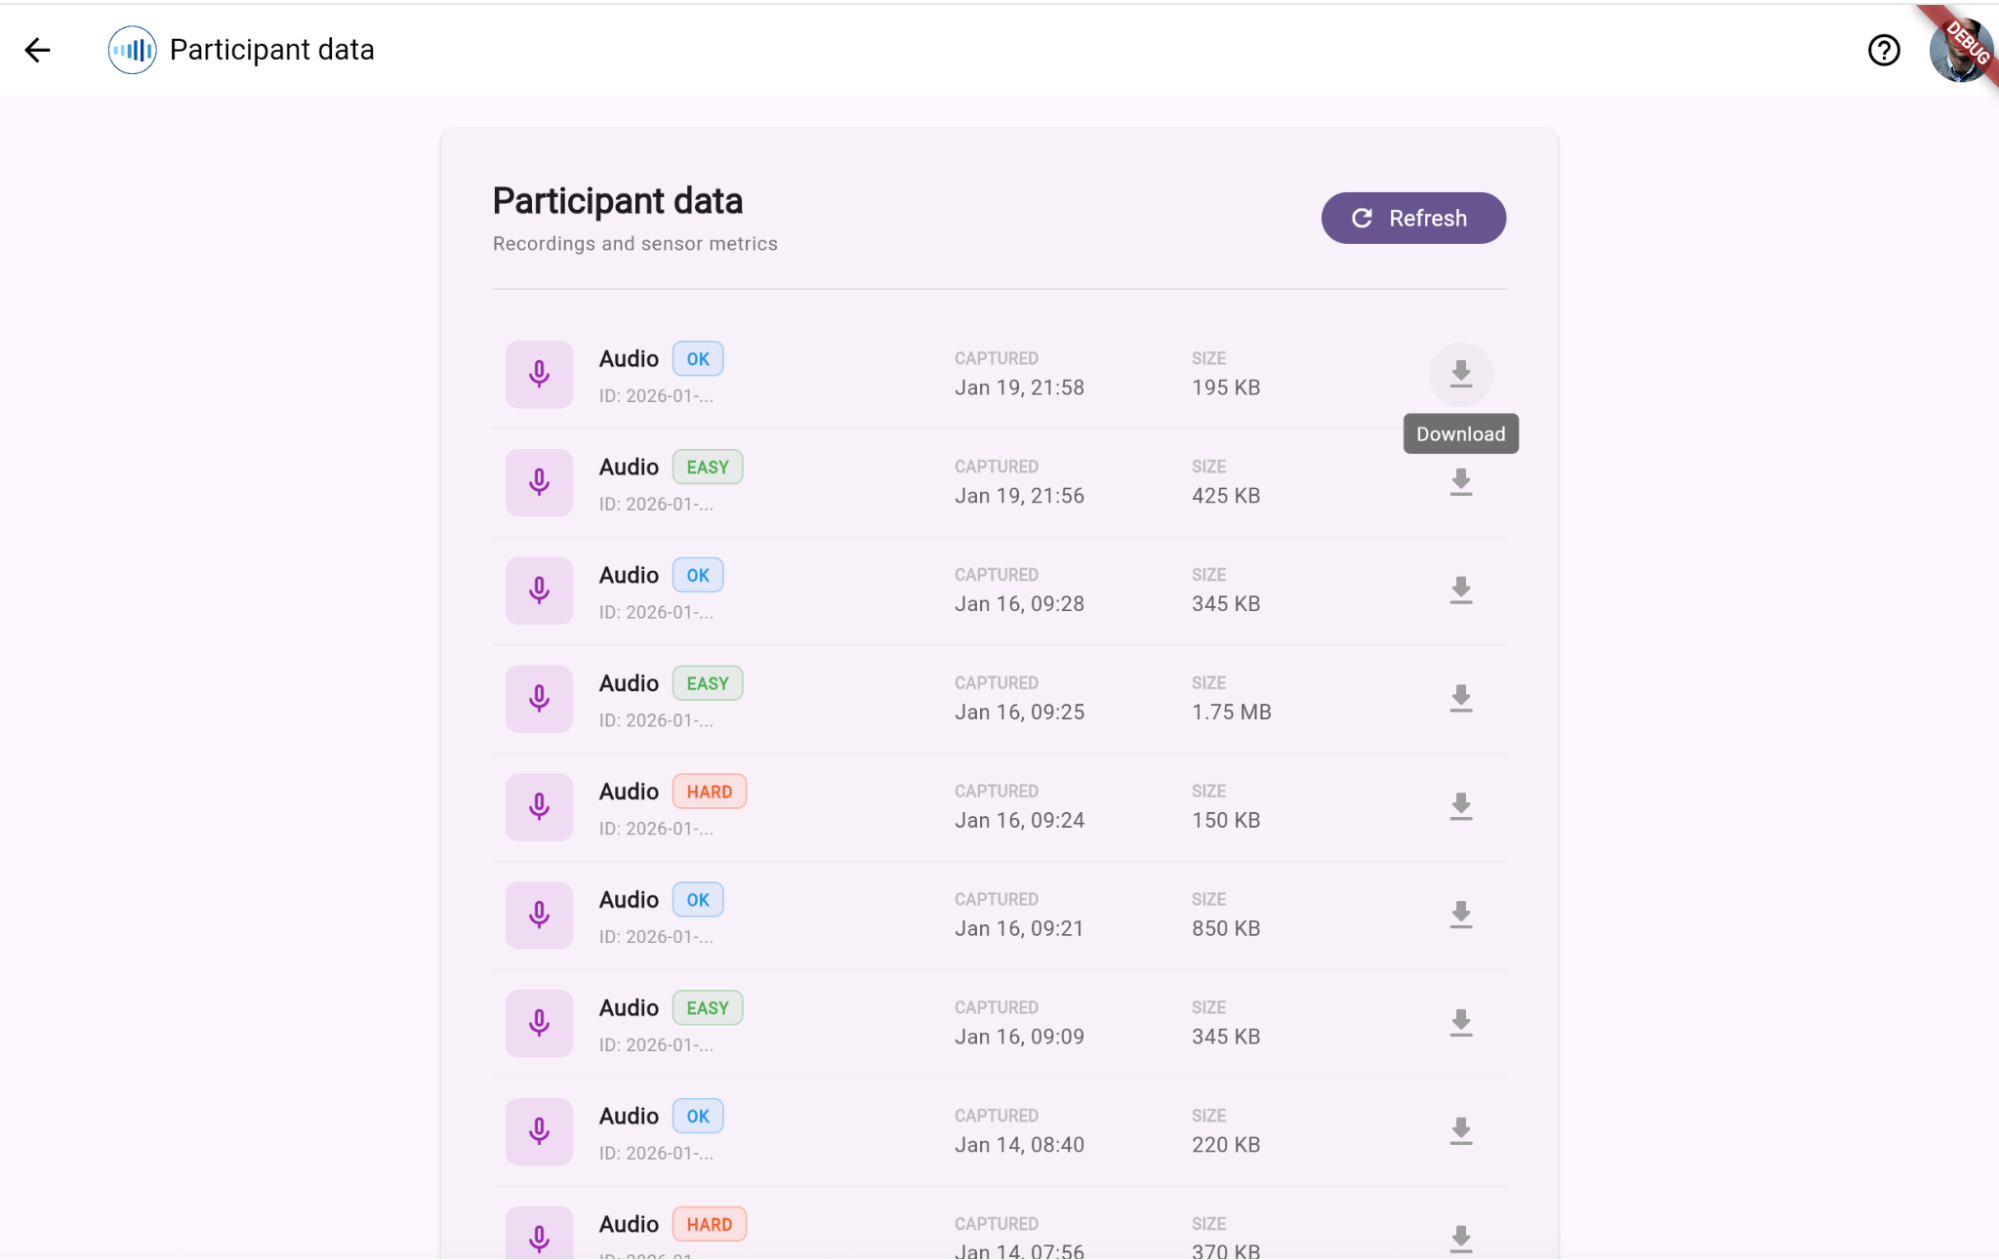
Once participants have used the app and data collection has begun you can click “View data” for a particular participant.
Step 14: View the Recordings
Review detailed time-series graphs and metadata attributes.
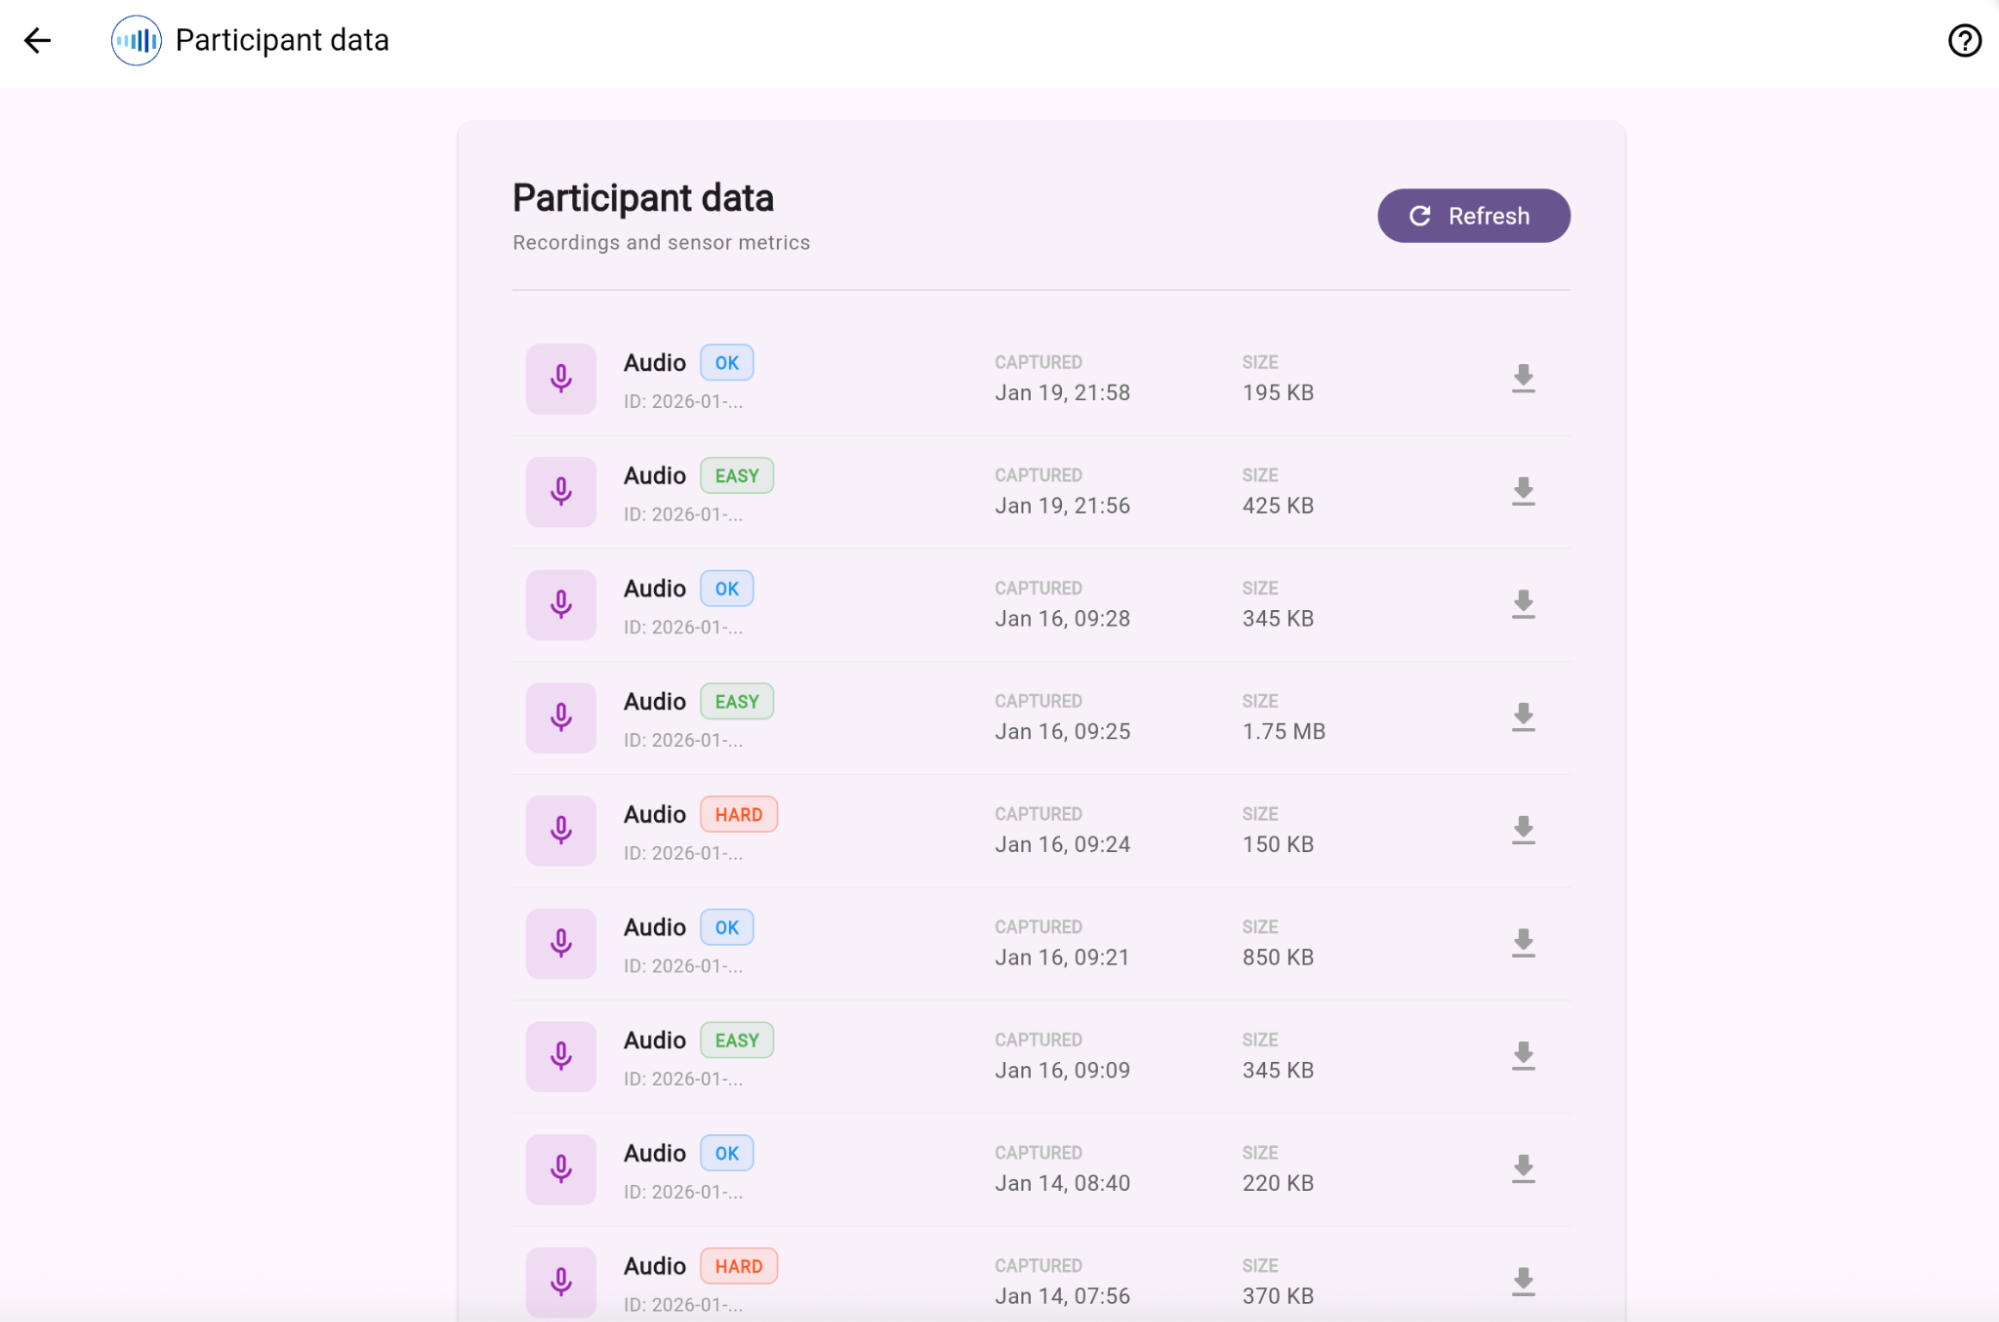
Step 15: Download Datasets
Download signed raw sensor archives and audio files directly via temporary short-lived pre-signed secure URLs.
Log back in to modify experiments and view the data at any time.